2. Parameter details
This chapter describes the details of the parameters configured in EXPRESSCLUSTER.
This chapter covers:
2.1. Parameter settings
2.2. Cluster properties
In Cluster Properties, you can view and change the cluster's settings.
2.2.1. Info tab
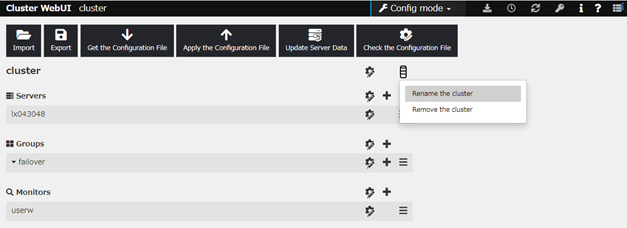
You can view the cluster name, and enter or change a comment for this cluster.

Cluster Name
The cluster name is displayed. You cannot change the name here.
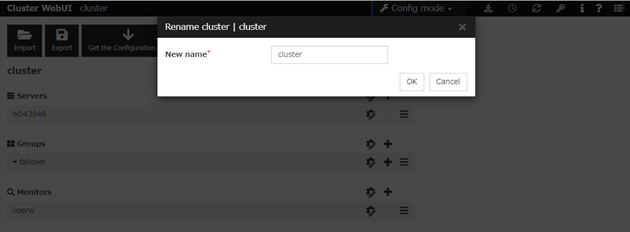
Changing the cluster name
click others, and then select Rename the cluster.
A dialog box to rename cluster is displayed.
Naming rules
Only alphanumeric characters, hyphen (-), underscore (_) and space are allowed for names.
Up to 31 characters (31 bytes)
Names cannot start or end with a hyphen (-) or space.
Comment
You can enter a comment for the cluster. Only alphanumeric characters are allowed.
Language
Select a language for cluster from the following. Set the language (locale) of OS on which the Cluster WebUI runs.
English
Japanese
Chinese
2.2.2. Interconnect tab
This tab allows you to set up network communication paths between cluster servers.
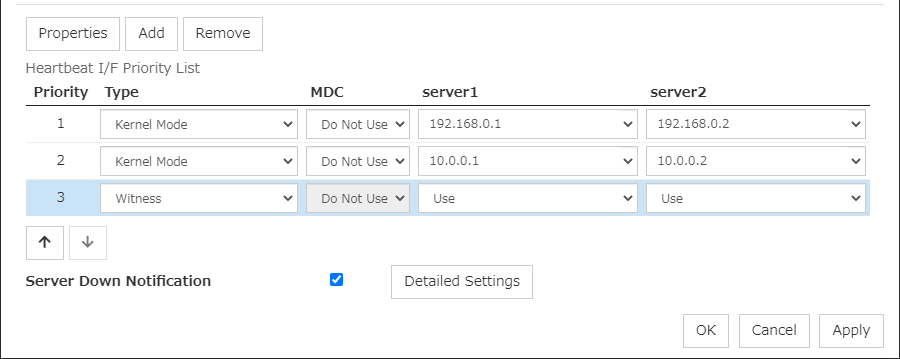
The Heartbeat I/F Priority List displays network communication paths between servers in the cluster.
Add
Adds a communication path. To specify the IP address of the communication path for each server, click a cell in each server's column, and then select or enter the address. For a communication route to which some servers are not connected, leave the cells for the unconnected servers blank.
Remove
Removes a communication path. Select the column of the communication path to remove, and then click Remove to remove the selected path.
Properties
Displays heartbeat properties window. This is only available only when the type is Witness.
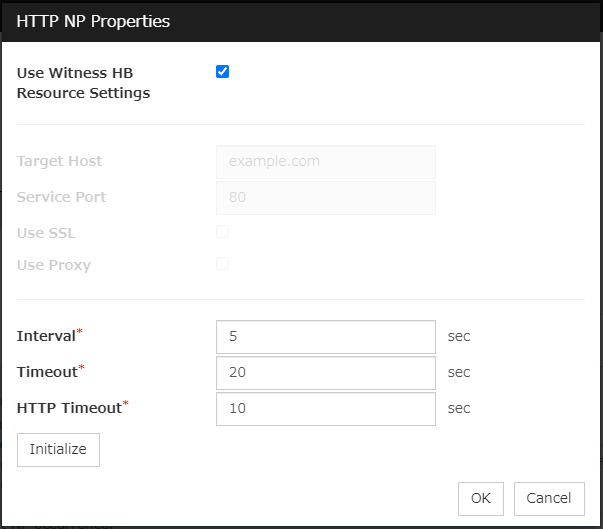
Witness HeartBeat Properties

Target Host
Sets the host address of the Witness server to be connected.
Service Port
Sets the port number of the Witness server to be connected.
Use SSL
Configures whether or not to use SSL for communicating with the Witness server. When the checkbox is selected, SSL is used, and when the checkbox is not selected, it is not used.
Use Proxy
Configures whether or not to use proxy for communicating with the Witness server. When the checkbox is selected, the settings of the proxy tab in the server properties become effective. When the checkbox is not selected, any proxy setting is not used even if the proxy is set in the server properties.
HTTP Timeout
Sets the timeout of receiving HTTP response.
Initialize
Resets the Witness heartbeat properties settings to default values.
Priority
When multiple interconnects are configured, the communication path with the smallest number in the Priority column is used preferentially for the internal communication among cluster servers. To change the priority, change the order of selected rows with the arrows.
It is recommended to specify a higher priority for the interconnect communication path than any other paths.
Note
Priority is used to decide on the priority of communication routes used for internal communication between the servers in the cluster. Heartbeat between the servers in the cluster is implemented on all communication routes that are set up for heartbeat, regardless of Priority.
Type
For a communication route used for kernel mode LAN heartbeat transmission (interconnect), click a cell in the Type column, and then select Kernel Mode.
Specify as many communication routes for the interconnect as possible.
To use Witness heartbeat, select Witness.
To prepare a dedicated data mirroring communication path (mirror disk connect), click the Type column cell and then select Mirror Communication Only.
MDC column
To use a communication path as a mirror disk connect, click the MDC column cell and then select a mirror disk connect.
The entry differs depending on the type.
Server column
The entry differs depending on the type.
Note
More than one IP addresses which belong to the same network address cannot exist in a single server. And also, inclusive relation cannot exist like the following relation.
IP address:10.1.1.10, subnet mask:255.255.0.0IP address:10.1.2.10, subnet mask:255.255.255.0To list the IP addresses to be set for the interconnect in the list box in the config mode of Cluster WebUI, execute Update Server Info.
Server Down Notification
When a server stops successfully (including shutdown and reboot), it is notified to other servers in the cluster. You can perform failover faster by notifying it in advance.
When failing to deactivate groups when a server stops (including shutdown and reboot), or when other abnormalities occur, other servers are not notified of it regardless of the settings of failed server notification.
Click Detailed Settings to configure the details of server reset notification.
Note
Making the settings effective requires the following:The check box of server down notification is checked.
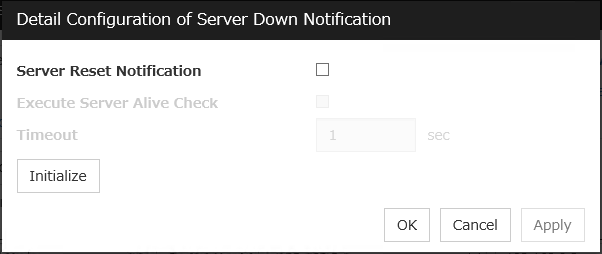
Server Reset Notification
This notification by the server means informing other servers of its stop due to Reset the hardware or Generate an intentional stop error.
Execute Server Alive Check
Timeout
Specify a value for the timeout of checking whether the server is alive. If the value is larger than that for the heartbeat timeout, the latter timeout value is applied.
2.2.3. Fencing tab
Set up the network partition (NP) resolution method and the forced stop function.
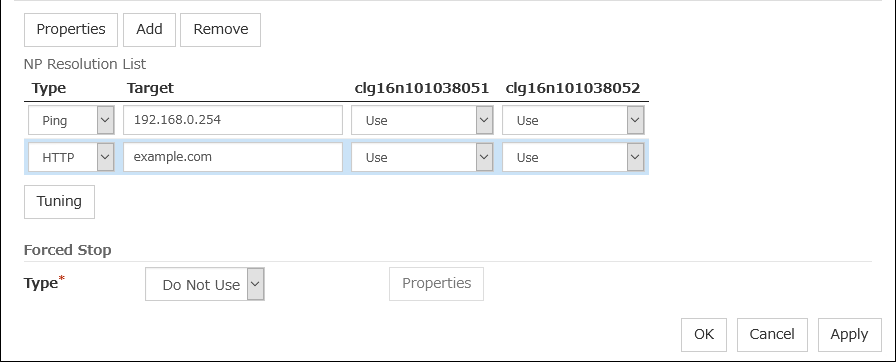
2.2.3.1. NP Resolution
The network partition resolution interface used for EXPRESSCLUSTER is displayed on the NP Resolution List.
Add
Add network partition resolution (NP resolution) resource. Click the Type column cell and select the type of NP resolution (DISK, Ping, HTTP, Majority). If the type is Ping, click the Ping target column cell and set the IP address of the Ping destination device. Click the cell of each server and set Use or Do Not Use.
Remove
Remove network partition resolution resource. Select the network partition resolution resource to be removed and click Remove, then the selected network partition resolution resource is removed.
Properties
Only available when the selected resource type is DISK, Ping or HTTP. The DISK NP Properties, Ping NP Properties or HTTP NP Properties window is displayed.
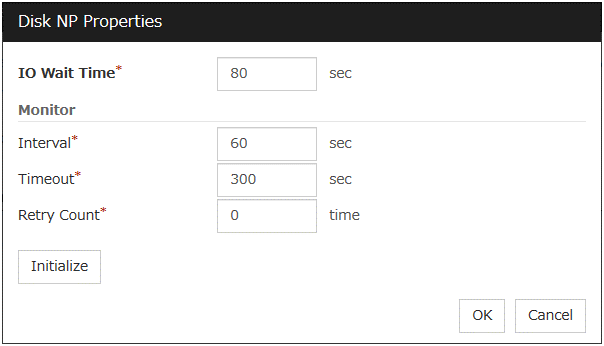
DISK NP Properties
Ping NP Properties
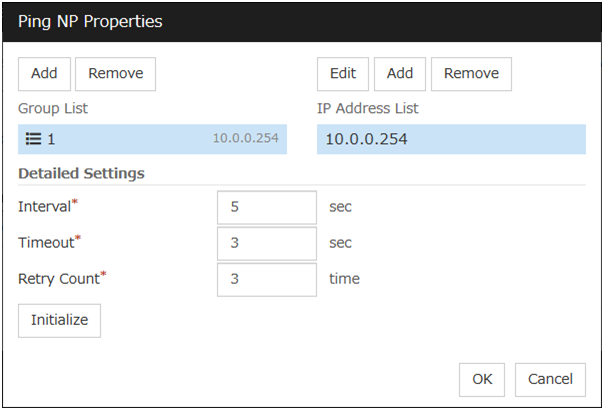
Add Group List
Add IP address group of Ping target.
The maximum number of registered group is 16.
If two or more IP addresses are registered in one group
With a response from one of the IP addresses, no NP state is considered to have occurred.
With no response from any of the IP addresses, an NP state is considered to have occurred. Then the action selected in Action at NP Occurrence is performed.
If two or more groups are registered
With a response from one of the IP addresses in a group, the group is considered to be normal.
With no response from any of the IP addresses in a group, the group is considered to be abnormal.
With one of the groups abnormal, an NP state is considered to have occurred. Then the action selected in Action at NP Occurrence is performed.
Conditional expression) Heartbeat timeout > (interval *retry count)
HTTP NP Properties
Type
Set the type of network partition resolution resource. DISK, Ping, HTTP, Majority is selectable.
Target
Enter the information depending on the type you chose.
Server
Entry differs depending on the type.
Note
To list the drive letters to be set for the disk heartbeat partition in the list box in the config mode of Cluster WebUI execute Update Server Info.
Tuning
Network Partition Resolution Tuning Properties window is displayed.
Network Partition Resolution Tuning Properties
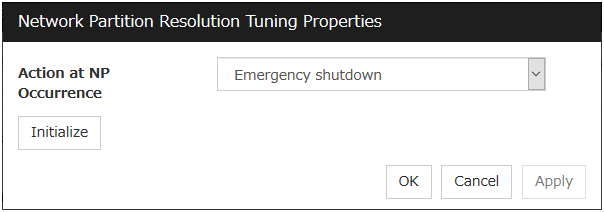
Action at NP Occurrence
Note
When mirror disk resources or hybrid disk resources are used, it is not recommended that you set Stop the cluster service for Action at NP Occurrence.If Stop the cluster service is set, you might have to run the forcible mirror recovery at the time of recovery from NP occurrence.
- 1
This function does not require ipmiutil, unlike the forced stop function.
2.2.3.2. Forced Stop
Type
Specify a type of forced stop resource to be used. If no forced stop resources are to be used, select Do Not Use.
Properties
Displays the properties window of a forced stop resource corresponding to the specified type.
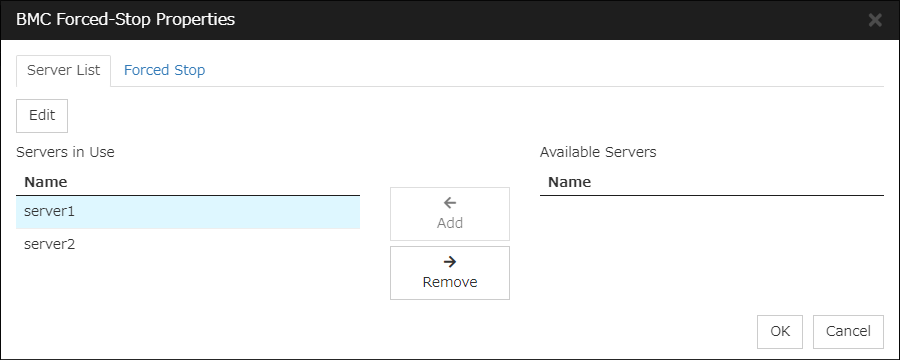
BMC Forced Stop Properties
Configure the forced stop of a physical machine. The BMC Forced Stop Properties dialog box is displayed by selecting BMC as a type of forced stop resource and then clicking Properties.
Server List tab
Add
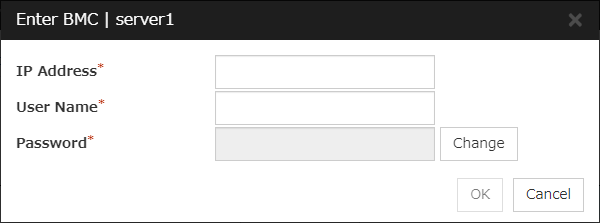
Adds, from available servers, a server to be configured. Selecting a server and clicking Add displays the Enter BMC dialog box.
Remove
Removes a server in use. Select an unnecessary server, then click Remove.
Edit
Use this for changing the settings of a server. Select a desired server, then click Edit. This displays the Enter BMC dialog box.
When configuring a cluster with different server models, exclude a server having no BMC. If you added such a server, the forced stop function would alert you to a failure in a periodical check on forcibly stopping the BMC.
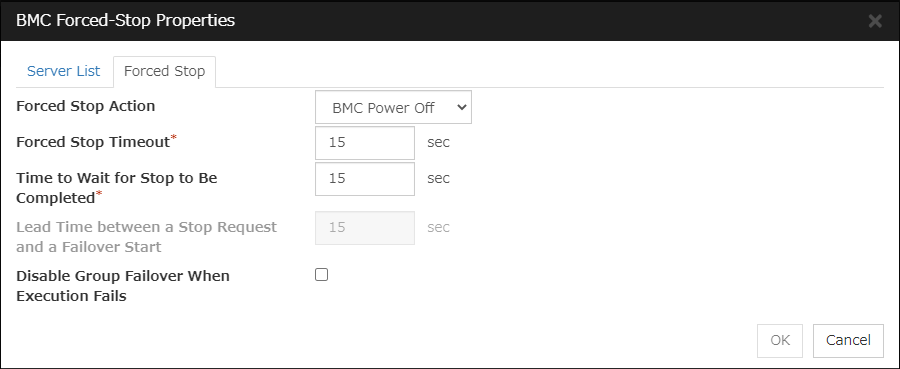
Forced stop tab
Forced Stop Action
Specify an action of the forced stop.
Forced Stop Timeout (0 to 999)
Specify a value for the timeout of awaiting the completion of a forced stop in action.
Time to Wait for Stop to Be Completed (0 to 999)
Specify a value for awaiting the completion of a forced stop in action. During the specified time period from the time of requesting a forced stop, whether the forced stop is completed is checked.Specify this value with BMC Power Off selected for Forced Stop Action.Lead Time between a Stop Request and a Failover Start (0 to 999)
Specify a value for awaiting the start of a failover with a forced stop in action. The failover occurs after a forced stop is requested and the specified time passes.Specify this value with BMC Reset, BMC Power Cycle, or BMC NMI selected for Forced Stop Action.Disable Group Failover When Execution Fails
Suppresses group failover if a forced stop fails. Since the group is not started in the failover destination in this case, check the state of the failover source, then manipulate the group as needed.
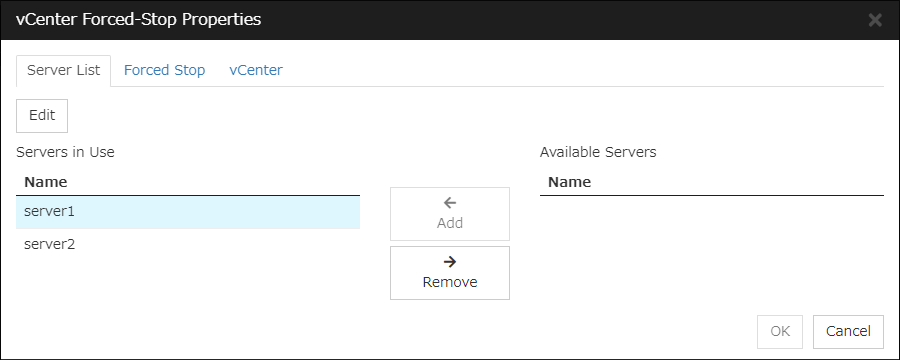
vCenter Forced Stop Properties
Configure the forced stop of a virtual machine (guest OS). The vCenter Forced Stop Properties dialog box is displayed by selecting vCenter as a type of forced stop resource and then clicking Properties.
Server List tab
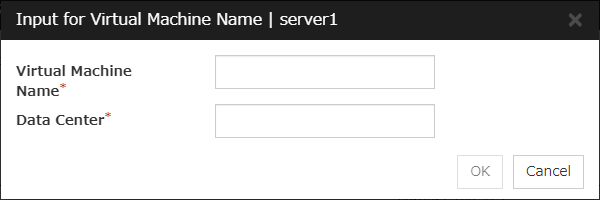
Add
Adds, from available servers, a server to be configured. Selecting a server and clicking Add displays the Input for Virtual Machine name dialog box.
Note
Do not use a double quotation mark (") or percent sign (%) in the virtual machine name.
Note
Do not use a double quotation mark (") or percent sign (%) in the data center name.
Remove
Removes a server in use. Select an unnecessary server, then click Remove.
Edit
Use this for changing the settings of a server. Select a desired server, then click Edit. This displays the Input for Virtual Machine name dialog box.
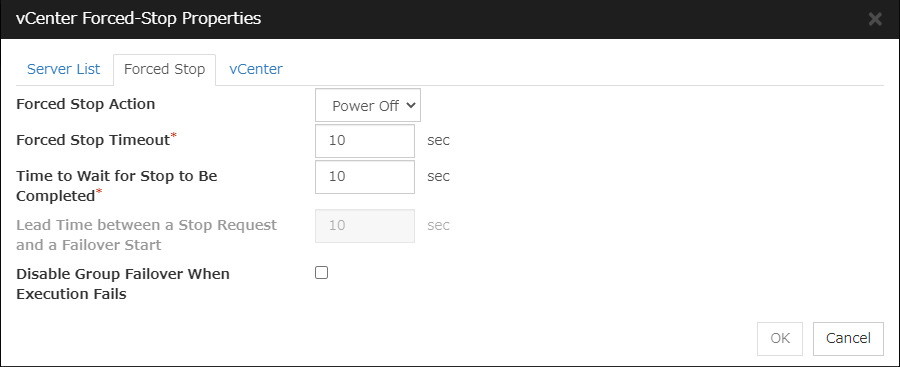
Forced stop tab
Forced Stop Action
Specify an action of the forced stop.
Forced Stop Timeout (0 to 999)
Specify a value for the timeout of awaiting the completion of a forced stop in action.
Time to Wait for Stop to Be Completed (0 to 999)
Specify a value for awaiting the completion of a forced stop in action. During the specified time period from the time of requesting a forced stop, whether the forced stop is completed is checked.Specify this value with Power Off selected for Forced Stop Action.Lead Time between a Stop Request and a Failover Start (0 to 999)
Specify a value for awaiting the start of a failover with a forced stop in action. The failover occurs after a forced stop is requested and the specified time passes.Specify this value with Reset selected for Forced Stop Action.Disable Group Failover When Execution Fails
Suppresses group failover if a forced stop fails. Since the group is not started in the failover destination in this case, check the state of the failover source, then manipulate the group as needed.
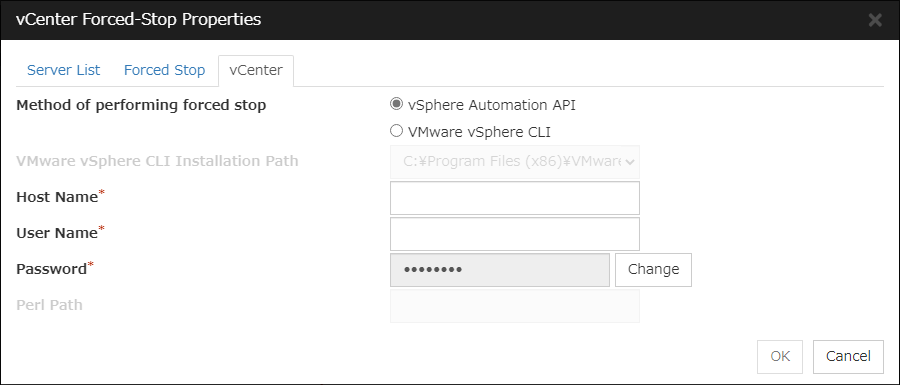
vCenter tab
Method of performing forced stop
Specify the Method of performing forced stop.
VMware vSphere CLI Installation Path (Within 1023 bytes)
Specify the installation path of the VMware vSphere CLI.This setting is required with VMware vSphere CLI specified as the method of performing a forced stop.Specification example:
C:\Program Files (x86)\VMware\VMware vSphere CLIHost name (Within 255 bytes)
Specify the IP address of the virtual machine management tool.
User Name (Within 255 bytes)
Specify the user name of the virtual machine management tool.
Password (Within 255 bytes)
Specify the password for the virtual machine management tool.
Note
Do not use a double quotation mark (") in the password.
Perl Path (Within 255 bytes)
Specify the Perl path to be used when executing the virtual machine forced stop. Specify an absolute path using ASCII characters. Do not add "" to the end of the path.This setting is required with VMware vSphere CLI specified as the method of performing a forced stop.Specification example:
C:\Perl64\bin\perl.exe
AWS Forced Stop Properties
Configure the forced stop of Amazon Web Services. The AWS Forced Stop Properties dialog box is displayed by selecting AWS as a type of forced stop resource and then clicking Properties.
Server List tab
Add
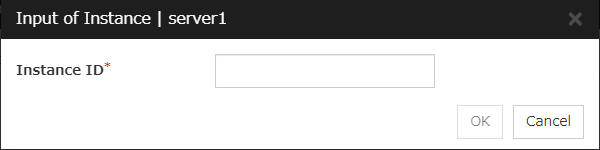
Adds, from available servers, a server to be configured. Selecting a server and clicking Add displays the Input of Instance dialog box.
Remove
Removes a server in use. Select an unnecessary server, then click Remove.
Edit
Use this for changing the settings of a server. Select a desired server, then click Edit. This displays the Input of Instance dialog box.
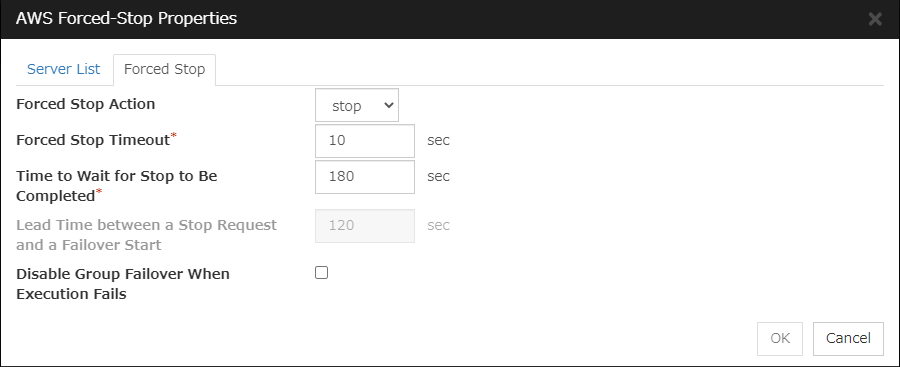
Forced stop tab
Forced Stop Action
Specify an action of the forced stop.
Forced Stop Timeout (0 to 999)
Specify a value for the timeout of awaiting the completion of a forced stop in action.
Time to Wait for Stop to Be Completed (0 to 999)
Specify a value for awaiting the completion of a forced stop in action. During the specified time period from the time of requesting a forced stop, whether the forced stop is completed is checked.Specify this value with stop selected for Forced Stop Action.Lead Time between a Stop Request and a Failover Start (0 to 999)
Specify a value for awaiting the start of a failover with a forced stop in action. The failover occurs after a forced stop is requested and the specified time passes.Specify this value with reboot selected for Forced Stop Action.Disable Group Failover When Execution Fails
Suppresses group failover if a forced stop fails. Since the group is not started in the failover destination in this case, check the state of the failover source, then manipulate the group as needed.

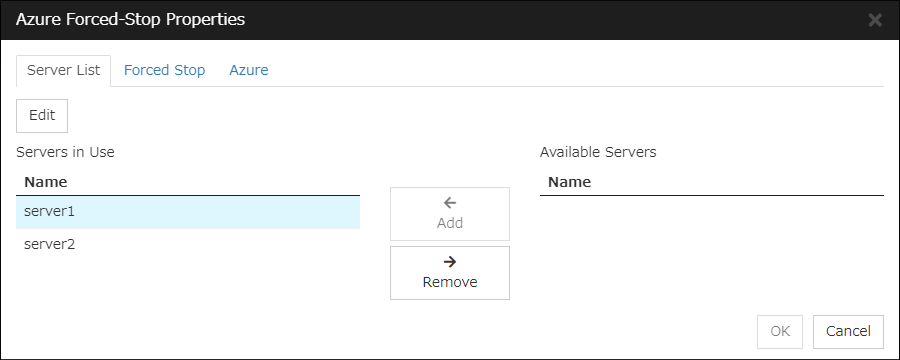
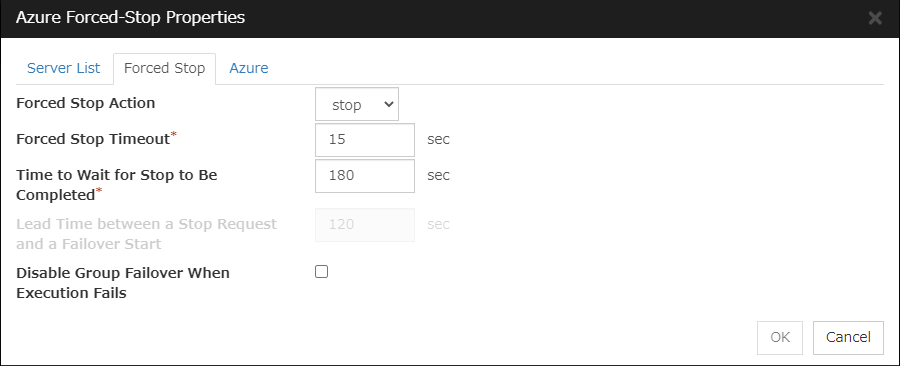
Azure Forced Stop Properties
Configure the forced stop of Microsoft Azure. The Azure Forced Stop Properties dialog box is displayed by selecting Azure as a type of forced stop resource and then clicking Properties.
Server List tab
Add
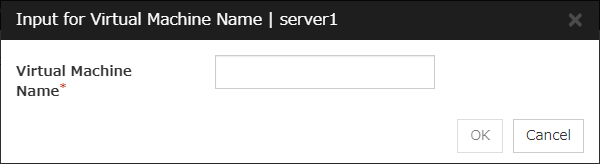
Adds, from available servers, a server to be configured. Selecting a server and clicking Add displays the Input for Virtual Machine name dialog box.
Remove
Removes a server in use. Select an unnecessary server, then click Remove.
Edit
Use this for changing the settings of a server. Select a desired server, then click Edit. This displays the Input for Virtual Machine name dialog box.
Forced stop tab
Forced Stop Action
Specify an action of the forced stop.
Forced Stop Timeout (0 to 999)
Specify a value for the timeout of awaiting the completion of a forced stop in action.
Time to Wait for Stop to Be Completed (0 to 999)
Specify a value for awaiting the completion of a forced stop in action. During the specified time period from the time of requesting a forced stop, whether the forced stop is completed is checked.Specify this value with stop selected for Forced Stop Action.Lead Time between a Stop Request and a Failover Start (0 to 999)
Specify a value for awaiting the start of a failover with a forced stop in action. The failover occurs after a forced stop is requested and the specified time passes.Specify this value with reboot selected for Forced Stop Action.Disable Group Failover When Execution Fails
Suppresses group failover if a forced stop fails. Since the group is not started in the failover destination in this case, check the state of the failover source, then manipulate the group as needed.
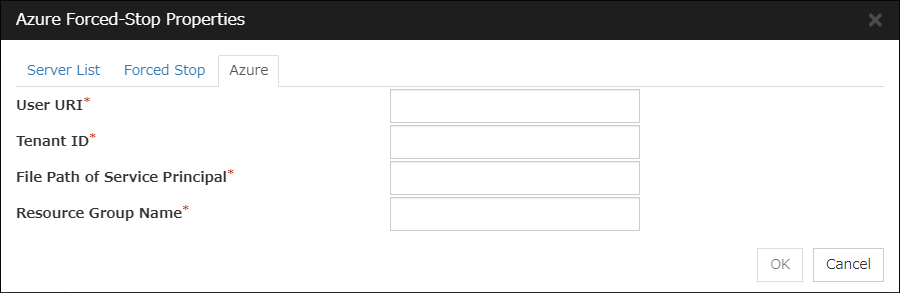
Azure tab
User URI (within 2048 bytes)
Specify the user URI to log on to Microsoft Azure.
Tenant ID (within 36 bytes)
Specify the tenant ID to log on to Microsoft Azure.
File Path of Service Principal (within 1024 bytes)
Specify the full path (including the drive letter) to the file of a service principal (certificate) to log in to Microsoft Azure.
Resource Group Name (within 90 bytes)
Specify a Microsoft Azure resource group name.
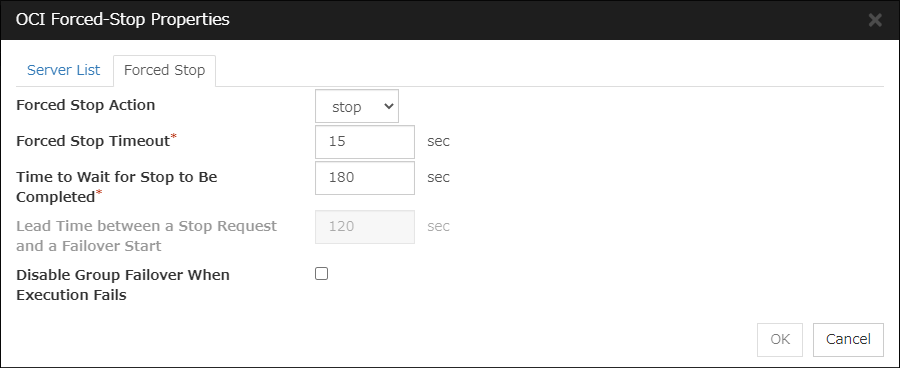
OCI Forced Stop Properties
Configure the forced stop of Oracle Cloud Infrastructure. The OCI Forced Stop Properties dialog box is displayed by selecting OCI as a type of forced stop resource and then clicking Properties.
Server List tab
Add
Adds, from available servers, a server to be configured. Selecting a server and clicking Add displays the Input of Instance dialog box.
Remove
Removes a server in use. Select an unnecessary server, then click Remove.
Edit
Use this for changing the settings of a server. Select a desired server, then click Edit. This displays the Input of Instance dialog box.
Forced stop tab
Forced Stop Action
Specify an action of the forced stop.
Forced Stop Timeout (0 to 999)
Specify a value for the timeout of awaiting the completion of a forced stop in action.
Time to Wait for Stop to Be Completed (0 to 999)
Specify a value for awaiting the completion of a forced stop in action. During the specified time period from the time of requesting a forced stop, whether the forced stop is completed is checked.Specify this value with stop selected for Forced Stop Action.Lead Time between a Stop Request and a Failover Start (0 to 999)
Specify a value for awaiting the start of a failover with a forced stop in action. The failover occurs after a forced stop is requested and the specified time passes.Specify this value with reboot selected for Forced Stop Action.Disable Group Failover When Execution Fails
Suppresses group failover if a forced stop fails. Since the group is not started in the failover destination in this case, check the state of the failover source, then manipulate the group as needed.


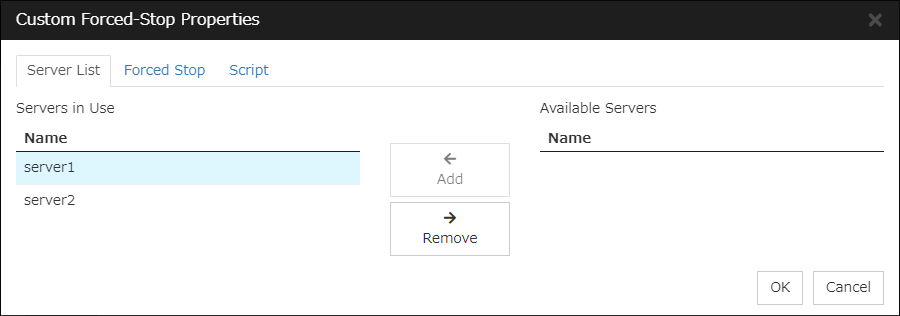
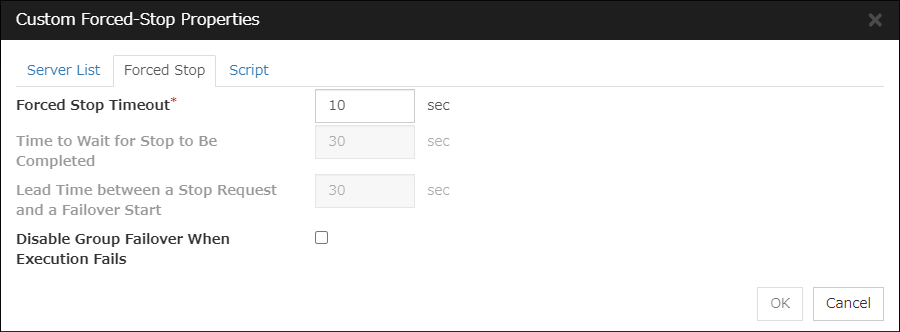
Custom Forced Stop Properties
Make settings on the script for the forced stop. The Custom Forced Stop Properties dialog box is displayed by selecting Custom as a type of forced stop resource and then clicking Properties.
Server List tab
Add
Adds a server from available servers.
Remove
Removes a server in use. Select an unnecessary server, then click Remove.
Forced stop tab
Forced Stop Timeout (0 to 999)
Specify a value for the timeout of awaiting the completion of a forced stop in action.
Time to Wait for Stop to Be Completed (0 to 999)
Not to be specified for this function.
Lead Time between a Stop Request and a Failover Start (0 to 999)
Not to be specified for this function.
Disable Group Failover When Execution Fails
Suppresses group failover if a forced stop fails. Since the group is not started in the failover destination in this case, check the state of the failover source, then manipulate the group as needed.
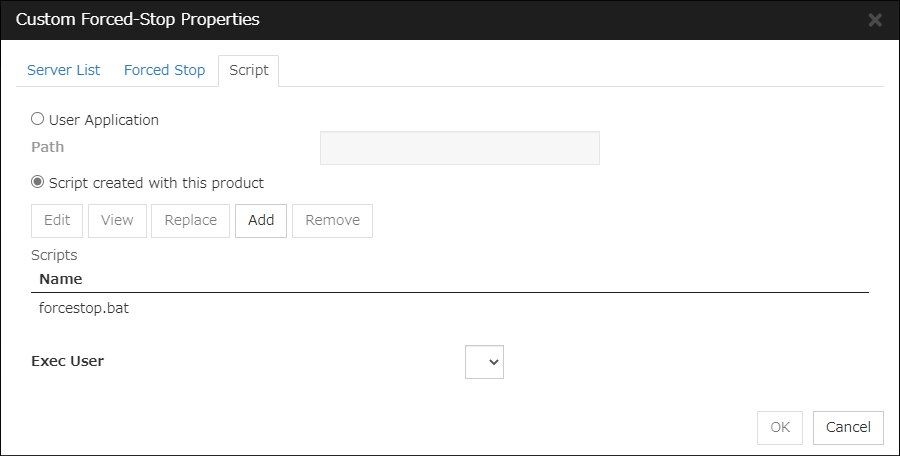
Script tab
The default script file names, forcestop.bat, are listed on Scripts.
User Application
Use an executable file (executable batch file or execution file) on the server as a script. For the file name, specify an absolute path or name of the executable file of the local disk on the server. If you specify only the name of the executable file, you must configure the path with environment variable in advance. If there is any blank in the absolute path or the file name, put them in double quotation marks ("") as follows.Example: "C:\Program Files\script.bat"If you want to execute VBScript, enter a command and VBScript file name as follows.Example: cscript script.vbsEach executable file is not included in the cluster configuration information of the Cluster WebUI. They must be prepared on each server because they cannot be edited or uploaded by the Cluster WebUI.
- Path (Within 1023 bytes)
- Script created with this product
- Add
Note
Do not use 2-byte characters for the name of a script to be added.Do not use "&( ampersand)" or "= (equal sign)" for a script file name to be added.- Remove
- View
- Edit
- Replace
- Exec User
2.2.4. Timeout tab
Specify values such as time-out on this tab.
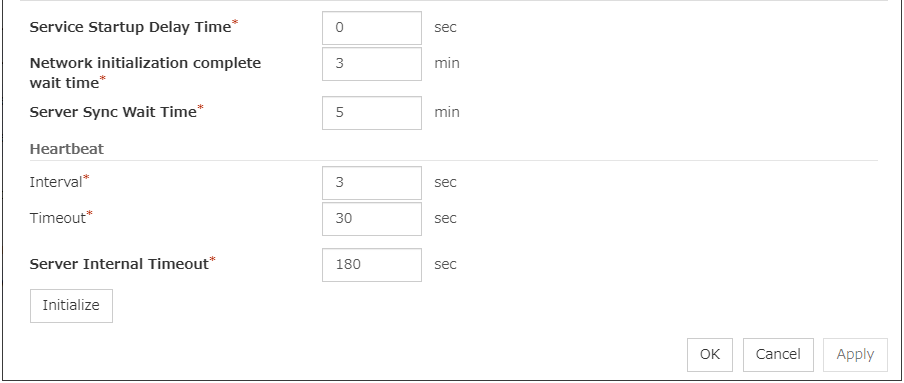
Service Startup Delay Time (0 to 9999)
Specify how long starting the cluster service should be delayed in starting the OS.
Network initialization complete wait time (0 to 99)
This is the time the server waits until its NIC becomes valid after startup.
Server Sync Wait Time (0 to 99)
For the time specified here, the server will wait at startup until other servers are started.
Heartbeat
Server Internal Timeout (1 to 9999)
The timeout to be used in the EXPRESSCLUSTER Server internal communications that are performed while an EXPRESSCLUSTER command is executed, or an operation is performed or a screen is displayed by Cluster WebUI.
Note
It is recommended to use the default value.Setting this parameter to an extremely large value significantly affects, in case of a heartbeat loss, the time for executing the clpstat command or for displaying Cluster WebUI.
Initialize
Used for initializing the value to the default value. Click Initialize to initialize all the items to their default values.
2.2.5. Port No. tab
Specify TCP port numbers and UDP port numbers.
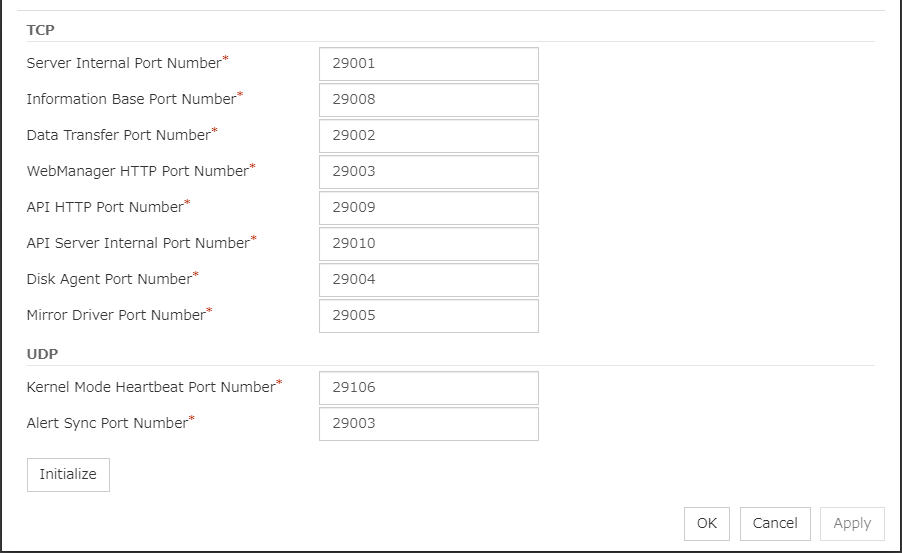
TCP
No TCP port numbers can be overlapped. When the Replicator/Replicator DR is used, they should not be overlapped with any mirror data port number of any mirror disk resources and hybrid disk resource.
UDP
Initialize
This is used for initializing the value to the default value. Click Initialize to initialize all the items to the default values.
2.2.6. Recovery tab
Make settings on cluster recovery.
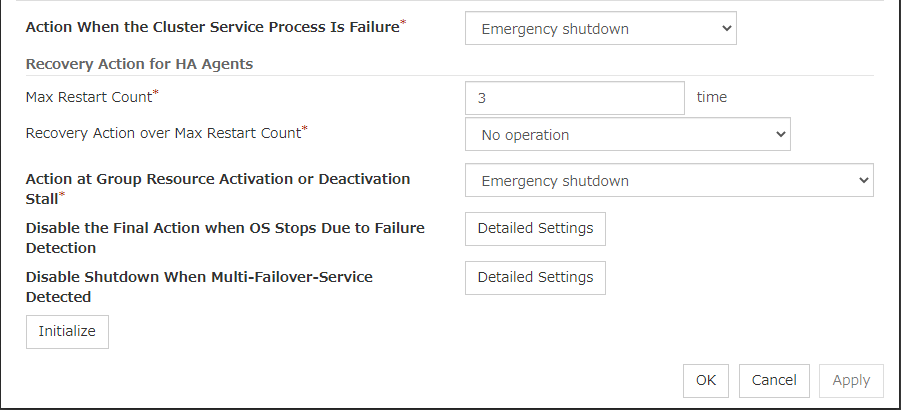
Action When the Cluster Service Process Is Failure
Specify an action at process abnormity of the cluster service.
Note
With a user mode monitor resource in operation: When a heartbeat timeout occurs during a shutdown, the system may perform a specified action which will be taken on a timeout occurrence in the user mode monitor resource.
This function allows monitoring the following cluster service process:
- 3
This function does not require ipmiutil, unlike the forced stop function.
Recovery Action for HA Agents
No operation
Note
The HA process is used with the system monitor resource, Process resource monitor resource, JVM monitor resource, and system resource information collection function.
Action at Group Resource Activation or Deactivation Stall
Specify the action to apply in the event of an activation/deactivation stall of a group resource.
Note
If a stall occurs with "Nothing (handle a stall as an activation/deactivation failure)" specified, the effect on the group resources is undefined, so we do not recommend changing the setting to "Nothing (handle a stall as an activation/deactivation If you do specify "Nothing (handle a stall as an activation/deactivation failure)", set the recovery operation upon the detection of an activation/deactivation failure of a group resource as described below.
Activation/deactivation retry threshold: 0 (times)
Failover threshold: 0 (times)
Final action: Intentionally causing a stop error
If Stop the cluster service and shut down OS or Stop the cluster service and reboot OS is specified as the final action, it takes a considerable amount of time for the cluster service to stop.
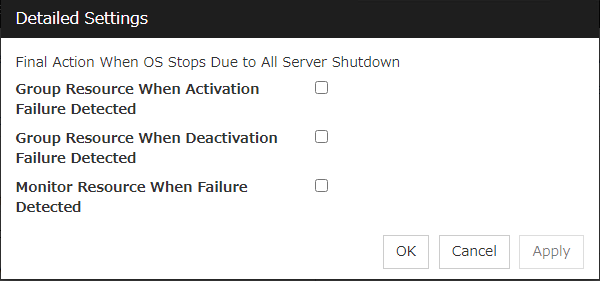
Disable the Final Action when OS Stops Due to Failure Detection
Click Detailed Settings to set suppression of the final action which accompanies the OS stop caused by error detection.
Note
If errors were detected on multiple servers almost at the same time, and the final action was taken for those servers, the final action which accompanies the OS stop may be taken for all the servers even if the final action caused by an error detection in a monitor resource is set to be suppressed.
The message receive monitor resource does not become the target for which the final action caused by error detection is suppressed.
The following situations lead to an OS stop during the final action when an activation/deactivation error is detected in a group resource and during the final action when a monitor resource error is detected.
Stop the cluster service and shutdown OS
Stop the cluster service and reboot OS
Generate an intentional stop error
Disable Shutdown When Multi-Failover-Service Detected
Click Detailed Settings to suppress the shutdown of all servers upon detection of both-system activation.
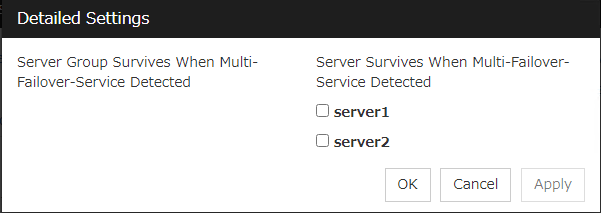
Server Group Survives When Multi-Failover-Service Detected
Select one server. The shutdown of the server, which belongs to the server group selected when the both-system activation of the failover group was detected, is suppressed. When the both-system activation is detected among servers in the selected server group, both of the servers will be shut down. If you want to suppress the shutdown in this case, make the settings to disable shutdown when the following double activation is detected.
Server Survives When Multi-Failover-Service Detected
Select one server. The shutdown of the server, selected when the both-system activation of the failover group was detected, is suppressed.If a server group to which shutdown is not executed when Multi-Failover is detected is set, it is possible to select only a server belonging to the set server group. If no server group is set, all the servers can be selected.Important
Suppose that shutdown is suppressed upon the detection of both-system activation in an environment in which the mirror disk resource is used for setting automatic mirror recovery. In this case, automatic mirror copying starts when the server which is shut down upon the detection of both-system activation is re-started through the OS. Care is needed since this discards one piece of data from among that updated separately on the mirror disk of each server at both-system activation.
You need to select a server for which the data is to be protected when suppressing shutdown caused by the detection of both-system activation in an environment in which the mirror disk resource is used.
Note
When the both-system activation is detected, the group statuses will be inconsistent among the servers, and failover and failback operations will be able to fail.
If a group status mismatch occurs, the following alert log is output:
Type: WarningModule name: rcEvent ID: 1104Message: A mismatch in the group %1 status occurs between the servers.To fix this problem, restart the group, execute a cluster reboot, restart all the servers on which the groups are not started, or restart the cluster services of all the servers on which the groups are not started.
2.2.7. Alert Service tab
Set up the alert service and network warning light.
Note
To use the mail alert function and network warning light, EXPRESSCLUSTER X Alert Service 5.1 for Windows is required.
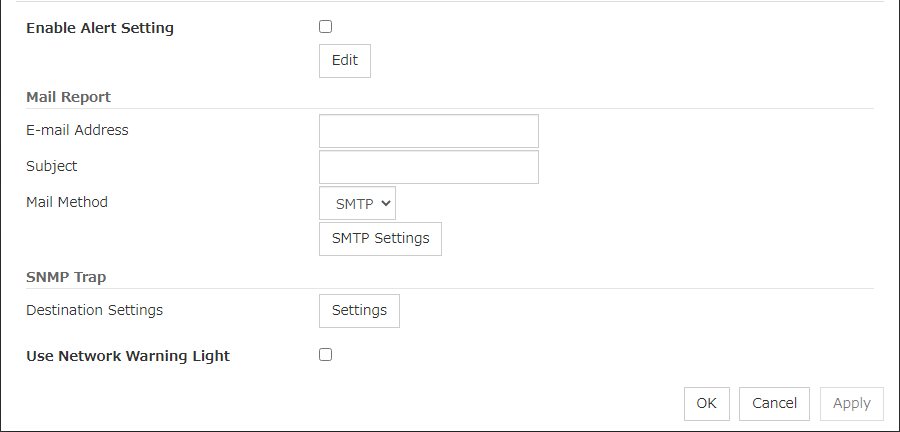
Enable Alert Setting
Configure whether to modify the alert destination from the default value. If you modify the alert destination, click Edit to set the destination address.If you clear the check box, the destination address you have modified returns to the default settings temporarily.For the default settings for the destination address, see "Messages reported by event log and alert"in "11. Error messages" in this guide.
E-mail Address (Within 255 bytes)
Enter the e-mail address to which the report is sent. If more than two e-mail addresses are set, delimit the address by semicolon.
Subject (Within 127 bytes)
Enter the subject title for the e-mail message.
Mail Method
Configure the methods to send mail. In this version, SMTP is the only option in this.
Destination Settings
Configure the SNMP trap transmission function. Click Settings to configure the SNMP trap transmission destination.
Use Network Warning Light
Configure whether or not to use the warning light (dedicated product) controlled by network. The IP address of warning light is entered on the server property.
Change Alert Destination
Clicking Edit displays the Change Alert Destination dialog box.
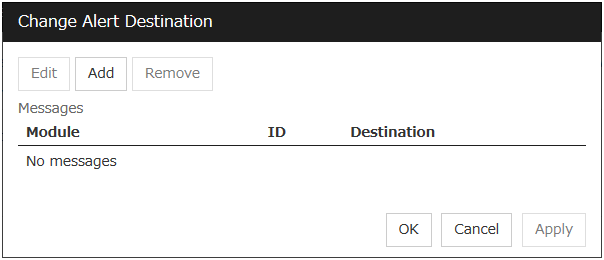
Add
Add the alert ID of the destination which you want to customize. Clicking Add displays the Enter the message dialog box.
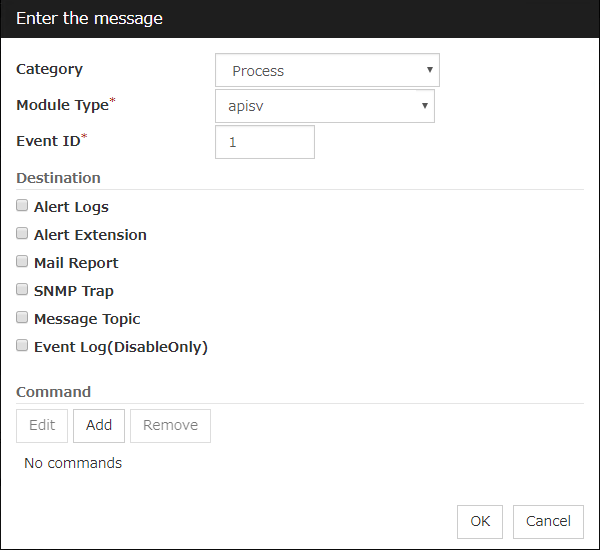
Category
Select a major category of the module type.
Module Type (Within 31 bytes)
Select the name of module type that you want to change the destination address.
Event ID
Enter the message ID of the module type for which you want to change the destination. For information on the message IDs, see "Messages reported by event log and alert"in "11. Error messages" in this guide.
Destination
Select a message destination from the following options.
Add
Add a command of the alert extension function. Click Add to display the Enter Command dialog box.
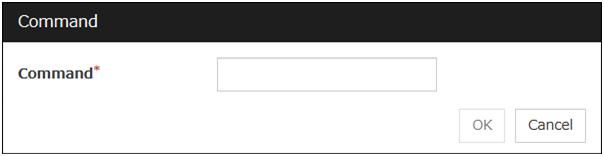
Command (Within 511 bytes)
Enter any command you want to use.
Remove
Click this to remove a command of alert extension function. Select the command and then click Remove.
Edit
Click this to modify a command of alert extension function. Select the command and then click Edit.
SMTP Settings
Click SMTP Settings to display the SMTP Settings dialog box used for the mail alert.
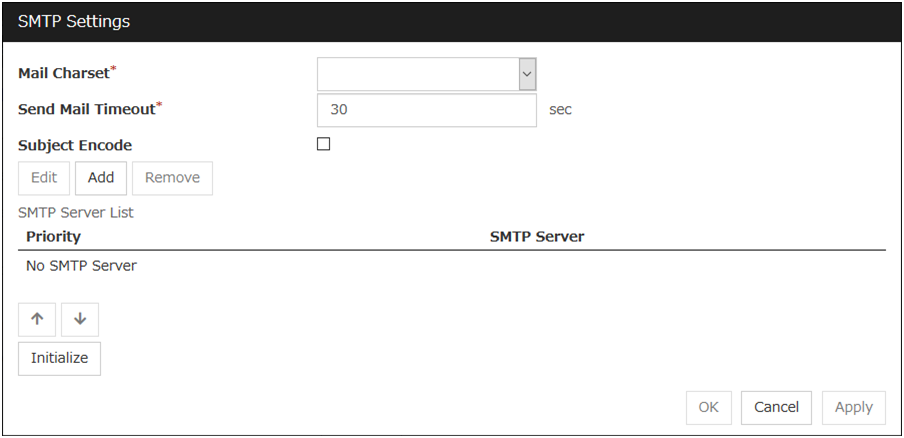
Mail Charset (Within 127 bytes)
Configure the character set of the e-mails sent for mail report.
Send Mail Timeout (1 to 999)
Configure the timeout value for communicating with the SMTP server.
Subject Encode
Select whether or not to encode the subject of e-mails.
SMTP Server List
Clicking this displays the configured SMTP servers. No more than four SMTP servers can be configured with this version.
Add
Use this button to add a SMTP server. Click Add to display the Enter the SMTP Server dialog box.
Remove
Use Remove to remove the SMTP server settings.
Edit
Use Edit to modify the SMTP server settings.
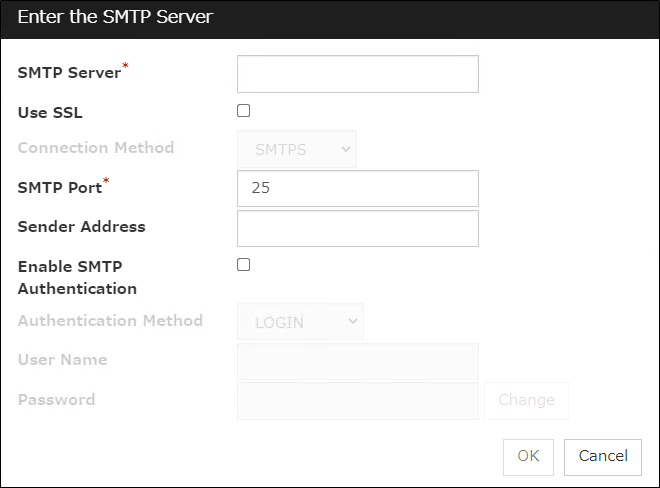
SMTP Server (Within 255 bytes)
Configure the IP address or host name of the SMTP server.
Use SSL
If you use SSL for communication with the SMTP server, select the checkbox; otherwise uncheck it.
When using SSL, go to the Encryption tab, then set SSL Library and Crypto Library.
For OpenSSL versions supporting this, see "Getting Started Guide" -> "Installation requirements for EXPRESSCLUSTER" -> "System requirements for the EXPRESSCLUSTER Server" -> "Operation environment for enabling encryption in mail reporting function".
Connection method
SMTP Port (1 to 65535)
Configure the port number of the SMTP server.
Sender Address (Within 255 bytes)
Configure the address from which an e-mail of mail report is sent.
Enable SMTP Authentication
Configure whether or not to enable SMTP authentication.
Authentication Method
Select a method of SMTP authentication.
User Name (Within 255 bytes)
Configure the user name used for SMTP authentication.
Password (Within 255 bytes)
Configure the password used for SMTP authentication.
SNMP Settings
Click this to display the Destination Settings dialog box which is used for the SNMP trap.
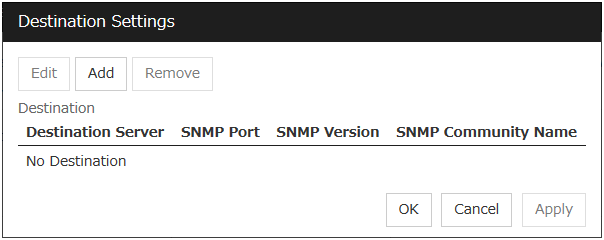
Destination
Displays the set SNMP trap transmission destinations. With this version, up to 32 SNMP trap transmission destinations can be set.
Add
Adds an SNMP trap transmission destination. Click Add to display the Change SNMP Destination dialog box.
Remove
Use Remove to remove the SNMP trap transmission destination settings.
Edit
Use Edit to modify the SNMP trap transmission destination settings.
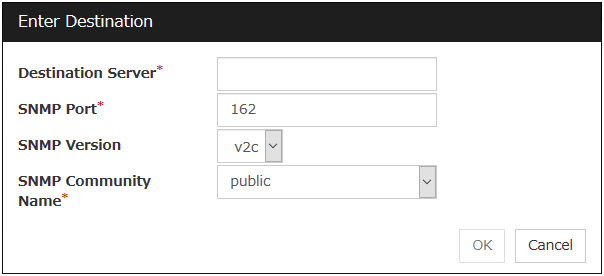
Destination Server (Within 255 bytes)
Configure the name of the SNMP trap transmission destination server.
SNMP Port No. (1 to 65535)
Configure the port number of the SNMP trap transmission destination.
SNMP Version
Configure the SNMP version of the SNMP trap transmission destination.
SNMP Community Name (Within 255 bytes)
Configure the SNMP community name of the SNMP trap transmission destination.
2.2.8. WebManager tab
Use this tab to configure the settings for the WebManager Server.
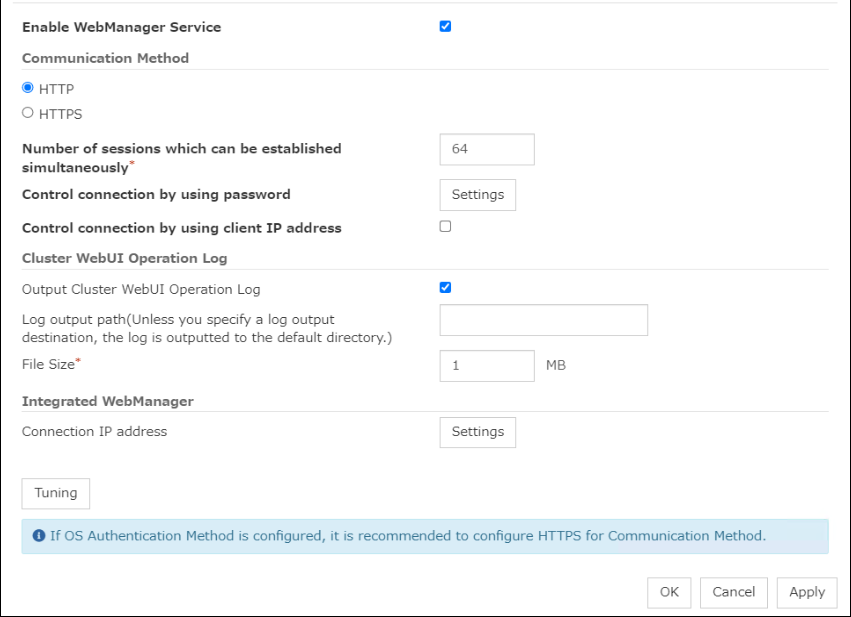
Enable WebManager Service
Enables the WebManager Service.
Communication Method
Number of sessions which can be established simultaneously (10 to 999)
Set the number of requests that can be simultaneously received from clients. If more requests than the number set here are generated, the excess requests will be discarded.
Control connection by using password
Click Settings to display the Password dialog box.
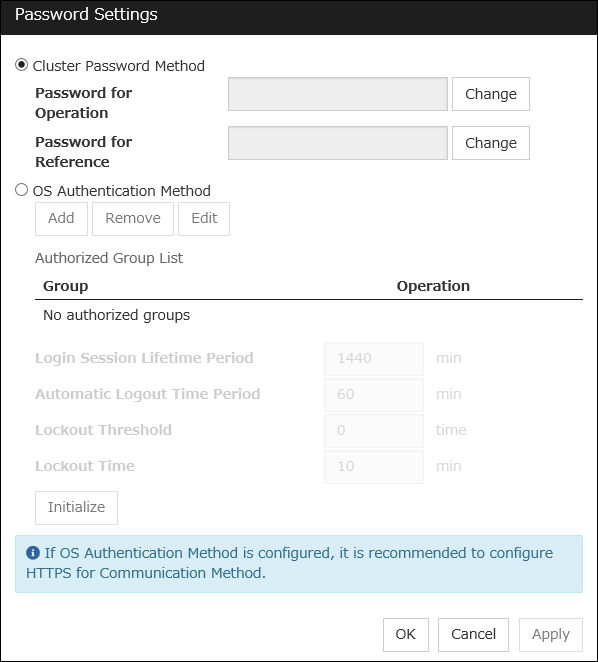
Cluster Password Method / OS Authentication Method
Choose a login method for Cluster WebUI from below.
Cluster Password Method

OS Authentication Method
Users must be registered to the server in advance to login to Cluster WebUI. More specifically, a group must be registered to the server and the users must belong to it as control permission of a cluster is assigned per group,
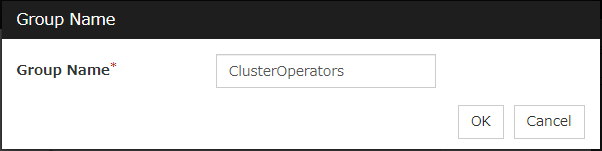
Add
Used to add a group to Authorized Group List. The Group Name dialog box appears when Add is clicked. To newly add a group, the Operation checkbox must be selected.
Remove
Used to delete a group from Authorized Group List.Select a group you want delete from Authorized Group List, and click Remove.
Edit
Used to edit a group. Select a group you want to edit from Authorized Group List, and click Edit. The Group Name dialog box with the selected group entered appears. The Operation does not change in this procedure.
Operation
Set Operation to a group registered in Authorized Group List.
Login Session Lifetime Period (0 to 52560)
Time frame of login session. If this value is set to zero (0), the period becomes limitless.
Automatic Logout Time Period (0 to 99999)
Sets wait time for automatic logout if there is no communication between Cluster WebUI and the WebManager server. If this value is set to zero (0), no automatic logout occurs.
Lockout Threshold (0 to 999)
Locks out a client IP address which fails to login continuously. The client cannot login until Lockout Time passes once a client is locked out. If this value is set to zero (0), no client IP address is locked out.
Lockout Time (1 to 99999)
Sets lockout time for a client IP address. Once the time passes, the lockout is automatically released.
Initialize
Restores the default value. If Initialize is clicked, the values of Login Session Lifetime Period, Automatic Logout Time Period, Lockout Threshold and Lockout Time are restored to the default values.
Control connection by using client IP address
If selected, accesses are controlled by client IP addresses.
Add
Use Add to add an IP address to Connection Permit Client IP Address List. Click Add to display the IP Address dialog box is displayed. Newly added IP addresses have the rights for the operation.

Remove
Use Remove to remove an IP address from Connection Permit Client IP Address List. Select the IP address you want to remove from Connection Permit Client IP Address List and then click Remove.
Edit
Use Edit to edit an IP address. Select an IP address you want to edit from Connection Permit Client IP Address List and then click Edit. The IP Address dialog box where the specified IP address is present is displayed. The rights for operating the edited IP addresses remain the same.
Operation
Sets the operation rights for IP addresses that are registered in Connection Permit Client IP Address List.
Output Cluster WebUI Operation Log
Allows you to output the operation log of Cluster WebUI.
For details, see "Maintenance Guide" - "The system maintenance information" - "Function for outputting the operation log of Cluster WebUI".
Log output path (Within 255 bytes)
Specify the output destination directory of the Cluster WebUI operation log with an absolute path consisting of ASCII characters.If no directory is specified, the Cluster WebUI operation log is outputted to <installation path>\log.
File Size (1 to 10)
Specify the size of Cluster WebUI operation log.When the log data reaches the specified size, a rotation occurs. Up to five generations of the data are saved.
IP address for Integrated WebManager
Click Settings to display the IP address for Integrated WebManager dialog box.
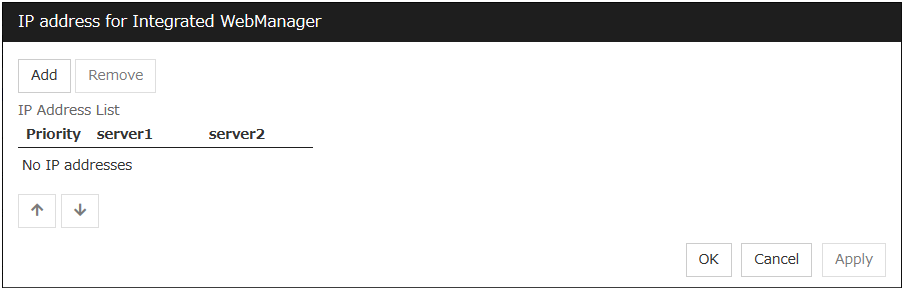
Add
Add IP addresses for the Integrated WebManager. Click the column cell of each server and select or enter IP address for the IP address of each server. For the communication path not connected to some server, set blank to the server cell of which the server is not connected.
Remove
Remove the communication path. Select the communication path to be removed and click Remove, then the selected path is removed.
Priority
When multiple IP addresses for Integrated WebManager are configured, the communication path with the smallest number in the Priority column is used preferentially for the internal communication among cluster servers. When changing the priority, click the arrows to change the order of the selected row.
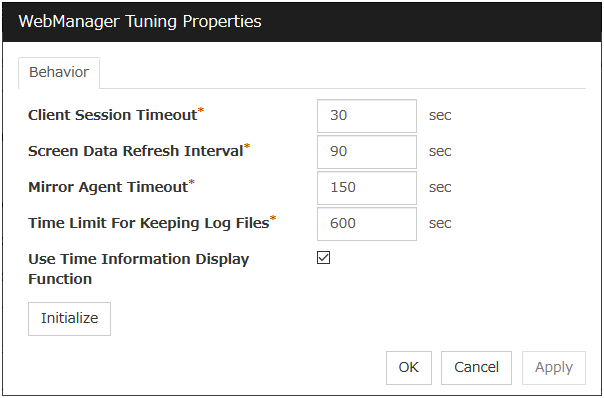
Tuning Properties
Use Tuning to tune the WebManager Server. Clicking Tuning displays the WebManager Tuning Properties dialog box.
2.2.9. API tab
This tab allows you to set API services.
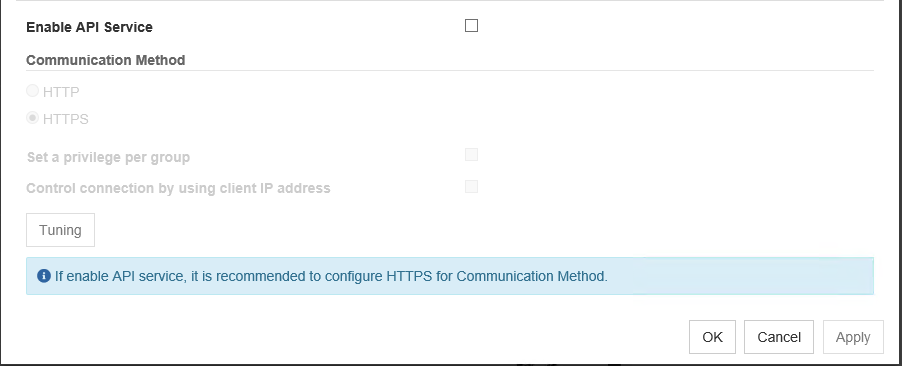
Enable API Service
Enables API services.
Communication Method
Control a privilege of operating clusters per group
Allows you to set and control a privilege of operating clusters per group.
Login users must be registered beforehand in the server which issues the request. More specifically, a group must be registered to the server and the users must belong to it as the control permission of a cluster is assigned per group.
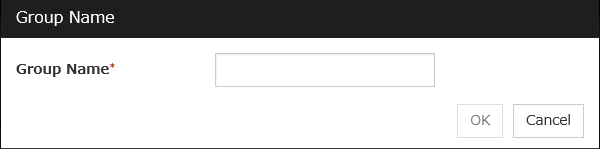
Add
Allows you to add a group to Authorized Group List. Clicking Add displays the Group Name dialog box. Any group added here has the Operation box checked.
Remove
Use this option to delete a group from Authorized Group List.From Authorized Group List, select a group to be deleted. Then, click Remove.
Edit
Use this option to edit a group. From Authorized Group List, select a group to be edited. Then click Edit. The Group Name dialog box appears with the selected group entered. Editing the group here does not change its operation right.
Operation
Set operation rights for any of the groups registered in Authorized Group List.
Control connection by using client IP address
Controls connections using client IP addresses.
Add
Use Add to add an IP address in Connection Permit Client IP Address List. Click Add to display the IP Address dialog box. Newly added IP addresses have the rights for the operation.
IP Address (Within 80 bytes)
Specify a client IP address allowed for the connection.
IP address: 10.0.0.21
Network address: 10.0.1.0/24
Remove
Use Remove to remove an IP address from Connection Permit Client IP Address List. Select the IP address to be removed from Connection Permit Client IP Address List and then click Remove.
Edit
Use Edit to edit an IP address. Select the IP address you want to edit from Connection Permit Client IP Address List and then click Edit. A dialog box where the specified IP address is preset is displayed.
Operation
Set operation rights for any of the IP addresses registered in Connection Permit Client IP Address List.
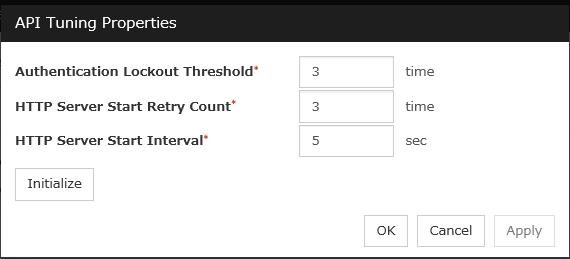
Tuning
Adjusts API services. Click Tuning to display API Tuning Properties dialog box .
2.2.10. Encryption tab
Sets files and libraries used for encryption of the cluster elated services.

Certificate File
Sets the server credential file used for connecting to a client. Users need to prepare the server credential file.
Private Key File
Sets the private key file used for connecting to a client. Users need to prepare the private key file.
SSL Library
Sets the SSL library file used for encryption and selects the SSL library file included in OpenSSL. Users need to change it based on the environment, such as an installation folder.
Crypto Library
Sets the Crypto library file used for encryption and selects the Crypto library file included in OpenSSL. Users need to change it based on the environment, such as an installation folder.
2.2.11. Alert Log tab
Configure the settings for the alert log.
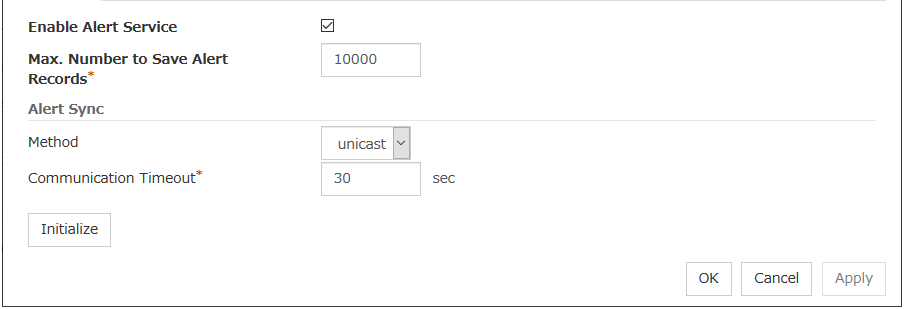
Enable Alert Service
Select this to start EXPRESSCLUSTER Web Alert service for the server.
Max. Number to Save Alert Records (1 to 99999)
Specify the maximum number of alert records that can be retained. EXPRESSCLUSTER Web Alert service for server can retain alert messages up to this number.
Alert Sync: Method
This communication mode is used for Alert Log synchronization. Only unicast is available in Method list box for this version.
Alert Sync: Communication Timeout (1 to 300)
Specify a communication time-out. A communication time-out is determined if the time specified here elapses after the last communication between EXPRESSCLUSTER Web Alert service and servers.
Initialize
Click Initialize to reset all settings on this tab to default. Click Initialize to set all items to their default values.
2.2.12. Delay Warning tab
Configure the settings for Delay Warning on this tab. For details on delay warnings, see "Delay warning of monitor resources" in "Monitor resources"in "4. Monitor resource details" in this guide.
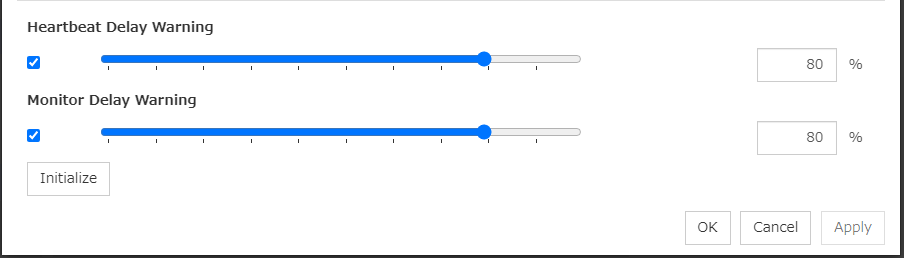
Heartbeat Delay Warning (1 to 99)
Set a percentage of heartbeat time-out at which the heartbeat delay warning is issued. If the time for the percentage passes without any heartbeat response, the warning will be produced in an alert log.
Monitor Delay Warning (1 to 99)
Set a percentage of monitor time-out at which the monitor delay warning is issued. If the time for the percentage passes without any monitor response, the warning will be produced in an alert log.
2.2.13. Disk tab
Configure the setting for a shared disk.
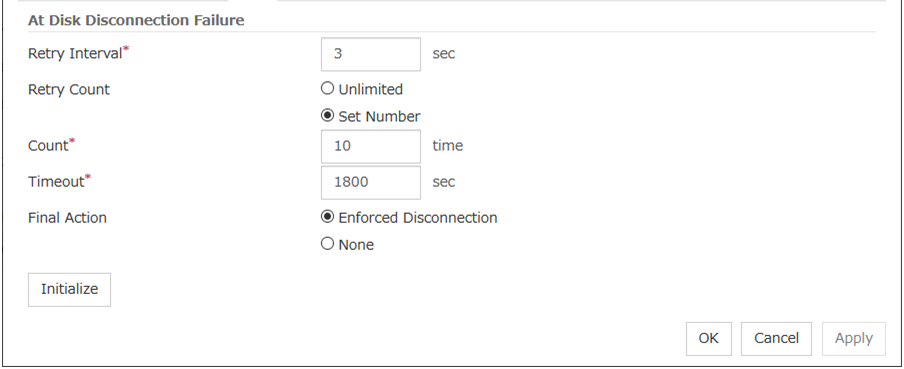
At Disk Disconnection Failure: Retry Interval (1 to 10)
Set the interval time required to retry disconnecting, when disconnecting a shared disk has failed.
At Disk Disconnection Failure: Retry Count (0 to 180)
Set the count to retry disconnecting when disconnecting a shared disk has failed.
At Disk Disconnection Failure: Timeout (1 to 9999)
Set the timeout at which to disconnect a shared disk.
At Disk Disconnection Failure: Final Action
If the count to disconnect a shared disk again is specified, set the action that will be taken in the case that disconnecting is failed for the specified count.
Initialize
This operation is used to return the value to the default value. Click Initialize to set all items to their default values.
Note
If the disk fails to be disconnected, retry or the final action is performed as many times as the value set above for each disk resource deactivation.However, an emergency shutdown occurs if a single deactivation takes 9999 or more seconds.To change the retry count and retry interval, set the values in consideration of the above event.
2.2.14. Mirror Disk tab
Configure the setting for a mirror disk.
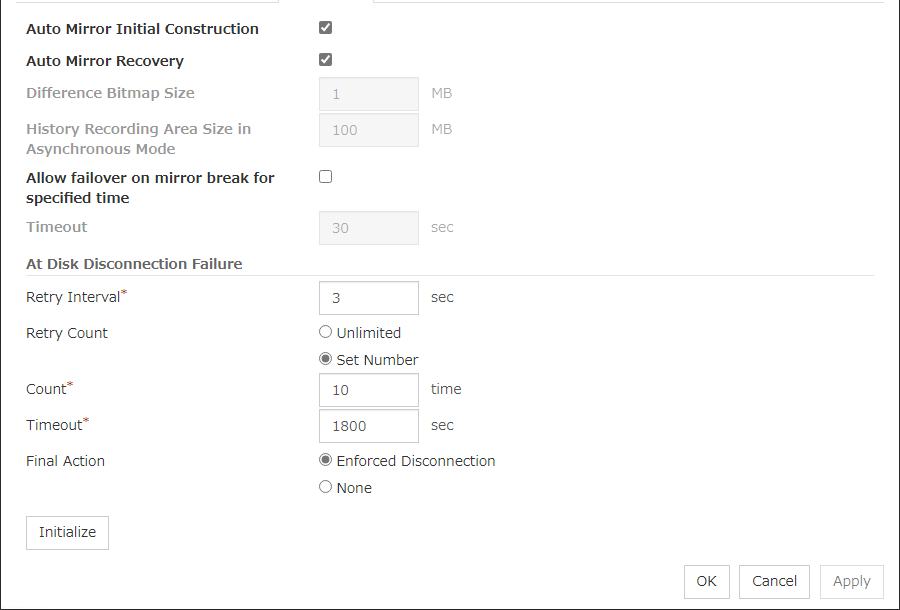
Auto Mirror Initial Construction
Specify whether to perform the mirror initial construction automatically when the newly created mirror disk resource is activated for the first time.
Auto Mirror Recovery
An automatic mirror recovery is performed when any difference occurs in the data of mirror disks between both servers. There is a case that mirror recovery cannot be performed automatically even if it is selected. For details, see "Automatically recovering from mirroring" in "Recovering from mirror breaks"in "10. Troubleshooting" in this guide.
Difference Bitmap Size (1 to 5)
Users can set the size of an area in which the data differential information between servers is recorded, when a mirror break occurs. If the data partition is 4TB or more, data transfer for mirror recovery is optimized by enlarging the size.This item needs to be set before establishing a mirror disk resource and a hybrid disk resource. If the mirror disk resource and the hybrid disk resource already exist in the cluster, the setting cannot be changed.
History Recording Area Size in Asynchronous Mode (1 to 100)
Users can set the size of an area in which the history of unsent data is recorded. In the asynchronous mode, a mirror break occurs if a certain amount of unsent data is stored. Larger size makes it harder for the mirror break to occur.This item needs to be set before establishing a mirror disk resource and a hybrid disk resource. If the mirror disk resource and the hybrid disk resource already exist in the cluster, the setting cannot be changed.
Allow failover on mirror break for specified time
Allow a failover to a server, with data in the mirror disk not up to date, to succeed for a specified time since the occurrence of a mirror break.
Important
For a successful failover to a server with data in the mirror disk not up to date, the data may be rolled back even in synchronization mode.
Note
In an environment where this option is selected, automatic mirror recovery after a mirror break is temporarily suppressed regardless of the settings for automatic mirror recovery.This suppression persists, until the failover succeeds or the specified time elapses.However, automatic mirror recovery may be resumed before the timeout specified for this function, if the suppression is preferentially removed by another function.This may cause a failover to fail.Note
If you select this option, disable the following failover attribute settings:
Fail over dynamically
Failover Attribute (Advanced)
For more information, see this guide: "3. Group resource details" -> "Group properties" -> "Attribute tab".Note
If you use this feature for a hybrid disk resource, make sure that the times of servers constituting a server group synchronize with each other.Without this synchronization, the behavior may not be as you expected.
Timeout (1 to 600)
Specify a time (since the occurrence of a mirror break) for which a failover is allowed.It is recommended to set the value equal to or higher than that for the heartbeat timeout. For more information, see this guide: "2. Parameter details" -> "Cluster properties" -> "Timeout tab".Setting the value lower than that for the heartbeat timeout may cause a failover to fail.
At Disk Disconnection Failure: Retry Interval (1 to 10)
Set the interval time required to retry disconnecting, when disconnecting a mirror disk has failed.
At Disk Disconnection Failure: Retry Count (0 to 180)
Set the count to retry disconnecting when disconnecting a mirror disk has failed.
At Disk Disconnection Failure: Timeout (1 to 9999)
Set the timeout at which to disconnect a mirror disk.
At Disk Disconnection Failure: Final Action
If a retry count is set for mirror disk disconnection, set the action when that will be taken in the case that disconnection still fails after the specified retry count exceeds.
Initialize
This operation is used to return the value to the default value. Click Initialize to set all items to their default values.
Note
If the disk fails to be disconnected, retry or the final action is performed as many times as the value set above for each mirror disk resource deactivation.However, an emergency shutdown occurs if a single deactivation takes 9999 or more seconds.To change the retry count and retry interval, set the values in consideration of the above event.
2.2.15. Account tab
The Account tab is used to register and/or delete a user account that is used in a force-stop script. You can set up to sixteen user accounts for one cluster system. Do not set seventeen or more accounts. Accounts that have already been set on all the cluster servers are the target to be registered. Account lists currently registered user accounts.
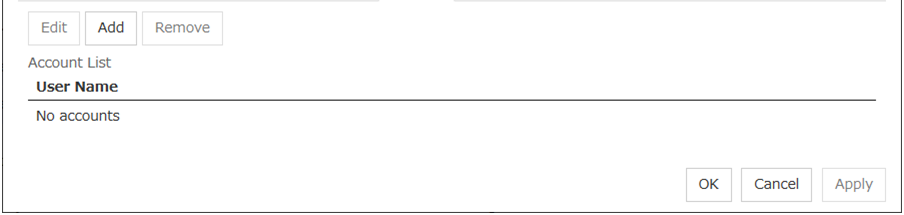
Add
Use Add to add a user account on the Account List. Click Add to display the Enter account dialog box.
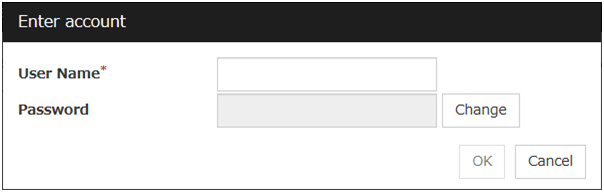
Edit
Use Edit to edit a user account. Select the user account you want to edit from Account and then click Edit. The Enter account dialog box where the selected account was entered is displayed.
2.2.16. RIP (Legacy) tab
When connecting to the EXPRESSCLUSTER Server from a remote LAN by using a virtual IP address, RIP must be sent to the public LAN which a router is connected to. The broadcast address of the RIP which is set on the cluster is displayed on the Network Address.
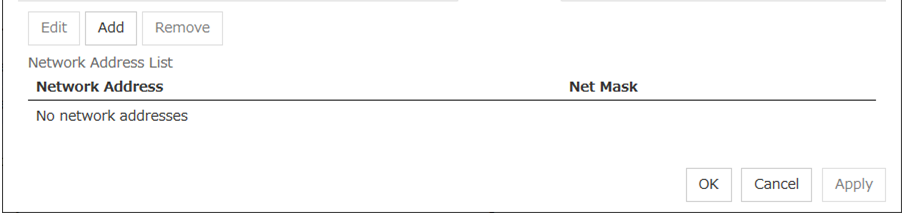
Add
Use Add to add a network address to the Network Address. Clicking Add displays the Enter network address dialog box.

Remove
Use Remove to remove a network address from the Network Address. Select the network address you want to remove from the Network Address and then click Remove.
Edit
Use Edit to edit a network address. Select the network address you want to edit from Network Address and then click Edit. The Enter network address dialog box where the selected network address was entered is displayed.
2.2.17. JVM monitor tab
Configure detailed parameters for the JVM monitor.
Note
To display the JVM monitor tab in the config mode of Cluster WebUI, you need to execute Update Server Info after the license for Java Resource Agent is registered.
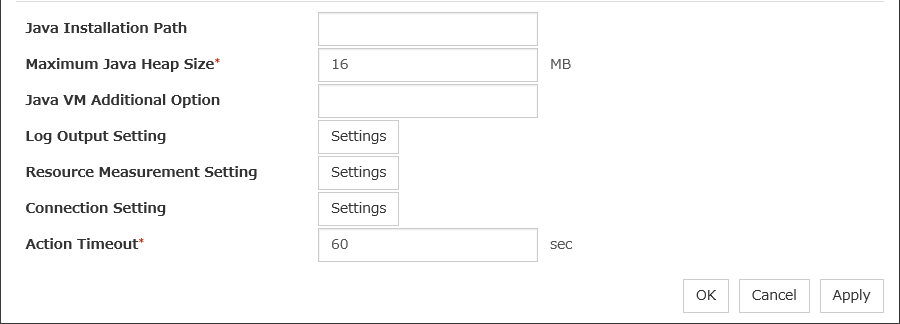
Java Installation Path(Within 255 bytes)
Set the Java VM install path used by the JVM monitor. Specify an absolute path using ASCII characters. Do not add " \ " to the end of the path. This setting becomes common for all servers in the cluster.Specification example:C:\Program Files\Java\jdk1.8.0_102
Maximum Java Heap Size(7 to 4096)
Set, in megabytes, the maximum Java VM heap size used by the JVM monitor (equivalent to -Xmx of the Java VM startup option). This setting becomes common for all servers in the cluster.
Java VM Additional Option (Within 1024 bytes)
Set the Java VM startup option used by the JVM monitor. However, specify -Xmx for Maximum Java Heap Size. This setting becomes common for all the servers in the cluster.Specification example: -XX:+UseSerialGC
Log Output Setting
Click the Settings button to open the Log Output Setting dialog box.
Resource Measurement Setting
Click the Settings button to open the Resource Measurement Setting dialog box.
Connection Setting
Click the Settings button to open the Connection Setting dialog box.
Action Timeout (30 to 300)
Set a timeout value for the [Command] that has been specified on each window of the JVM monitor. This setting becomes common for all of the [Commands].
Log Output Setting
Clicking Settings displays the Log Output Setting dialog box.
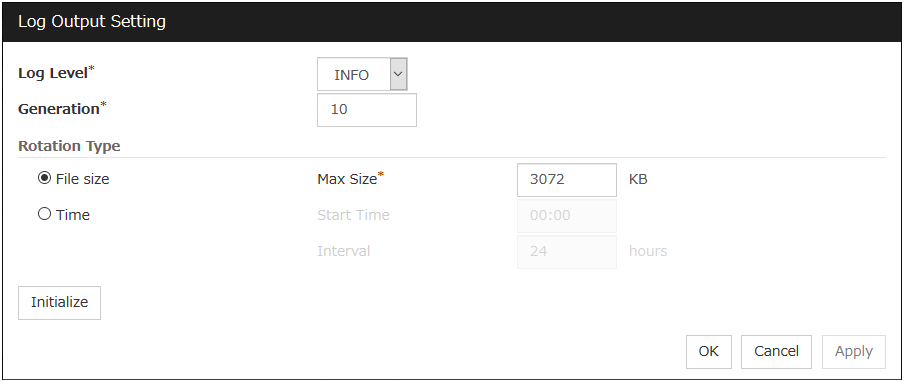
Log Level
Select the log level of the log output by the JVM monitor.
Generation (2 to 100)
Set the number of generations to be retained for the log output by the JVM monitor. When Period is selected for Rotation Type, the rotation count is reset when cluster is suspended. Therefore, note that log files under the <EXPRESSCLUSTER_install_path>log\ha\jra increase per cluster suspend.
Rotation Type
Select a rotation type for the log output by the JVM monitor. If you select File Capacity as the rotation type, set the maximum size (200 to 2097151), in kilobytes, for each log file such as the JVM operation log. If you select Period as the rotation type, set the log rotation start time in "hh:mm" format (hh: 0 to 23, mm: 0 to 59) and the rotation interval (1 to 8784) in hours.
Initialize
Clicking Initialize returns the log level, generation, and rotation type items to their default values.
Resource Measurement Setting [Common]
Clicking Settings displays the Resource Measurement Setting dialog box. For details on the scheme for error judgment by the JVM monitor, see "4. Monitor resource details".

Retry Count (1 to 1440)
Set the resource measurement retry count to be applied if the JVM monitor fails in resource measurement.
Error Threshold (1 to 10)
Set the number of times abnormal judgment is performed when the usage of the Java VM or the application server resources collected by the JVM monitor via resource measurement continuously exceed the customer-defined threshold.
Memory Usage, Active Threads (15 to 600)
Set the interval at which the JVM monitor measures the memory usage and active thread count.
The time and count in Full GC (15 to 600)
Set the interval at which the JVM monitor measures the time and count in Full GC execution.
Initialize
Clicking Initialize returns the retry count, error threshold, and interval items to their default values.
Resource Measurement Setting [WebLogic]
Clicking Settings displays the Resource Measurement Setting dialog box. For details on the scheme for error judgment by the JVM monitor, see "4. Monitor resource details".
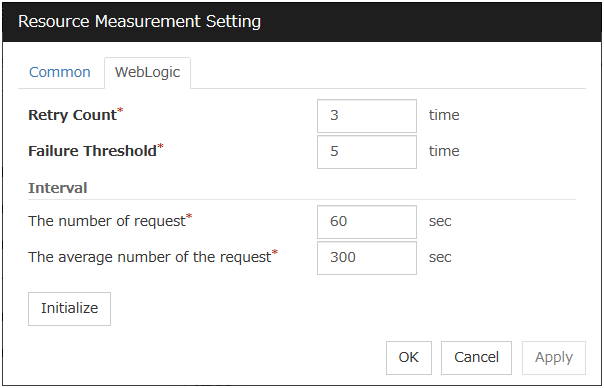
Retry Count (1 to 5)
Set the resource measurement retry count to be applied if the JVM monitor fails in resource measurement.
Error Threshold (1 to 10)
Set the number of times abnormal judgment is performed when the usage of the Java VM or the application server resources collected by the JVM monitor via resource measurement continuously exceed the customer-defined threshold.
The number of request (15 to 600)
Set the interval at which the JVM monitor measures the number of work manager or thread pool requests during WebLogic monitor.
The average number of the request (15 to 600)
Set the interval at which the JVM monitor measures the average number of work manager or thread pool requests during WebLogic monitor. Set a value that is an integer multiple of the value set in Interval: The number of request.
Initialize
Clicking Initialize returns the retry count, error threshold, and interval items to their default values.
Connection Setting
Clicking Settings displays the Connection Setting dialog box.
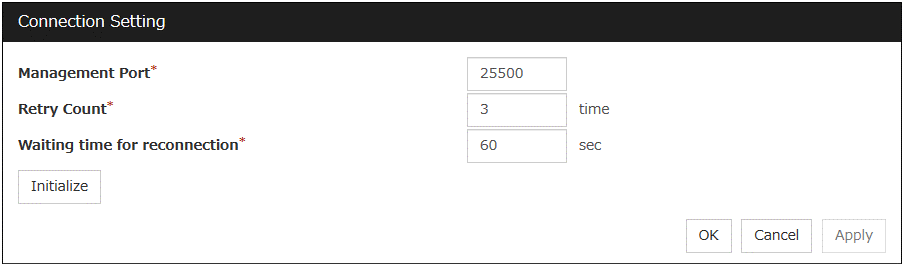
Management Port (1 to 65535)
Sets the port number internally used by the JVM monitor resource. Make sure not to set the port number that has been used by other functions or programs. This setting becomes common for all the servers in the cluster. Do not set 42424 to 61000.
Retry Count (1 to 5)
Set the retry count to be applied if connection to the monitor target Java VM fails.
Waiting time for reconnection (15 to 60)
Set the interval at which the JVM monitor retries connection if it fails in Java VM connection.
Initialize
Clicking Initialize sets the management port, retry count, and waiting time for reconnection items to their default values.
2.2.18. Cloud tab
Configure functions for cloud environments.
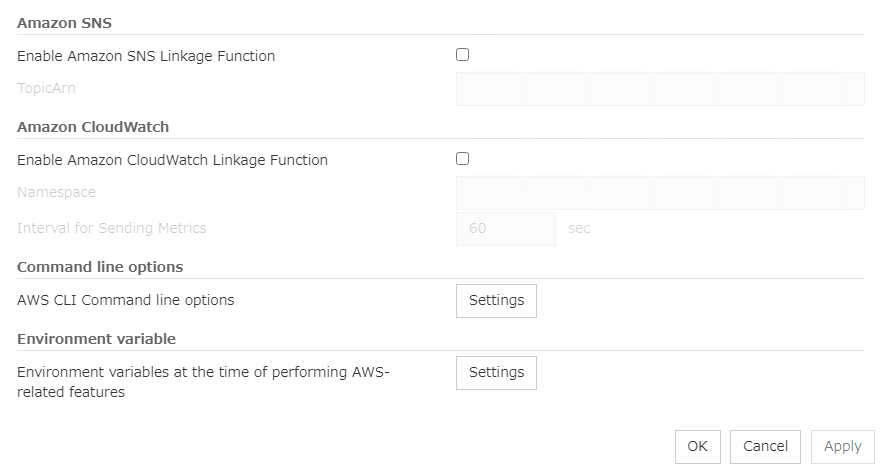
Enable Amazon SNS linkage function
Enable or disable the Amazon SNS linkage function.
TopicArn
Set TopicArn for the Amazon SNS linkage function.
Enable Amazon CloudWatch linkage function
Enable or disable the Amazon CloudWatch linkage function.
Note
Using the Amazon CloudWatch linkage function requires turning on Enable Amazon CloudWatch linkage function, and enabling Send polling time metrics of the Monitor (common) tab for the target monitor resource.
Namespace
Set Namespace for the Amazon CloudWatch linkage function.
Interval for Sending Metrics
Set the frequency of informing Amazon CloudWatch of the monitoring process time taken by the monitor resource.
AWS CLI command line options
Clicking Settings displays a text box for each AWS service.For each AWS service, set AWS CLI command line options to be applied.
Environment variables at the time of performing AWS-related features
Clicking Settings displays a dialog box listing environment variables.
Environment variable List
Clicking Edit displays a dialog box to edit the selected environment variable.Clicking Add displays a dialog box to add a new environment variable.Clicking Remove deletes the selected environment variable.
Enter environment variable
Enter the name and value of an environment variable.
2.2.19. Statistics tab
Configure the settings for statistics.
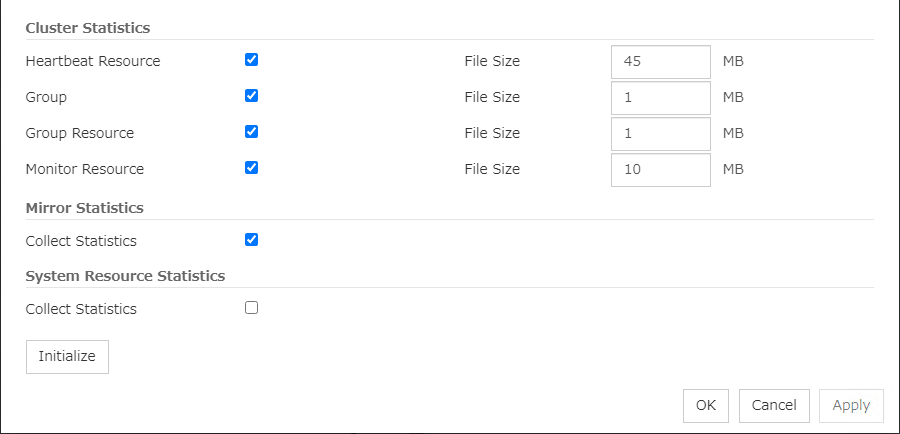
Cluster Statistics
You can collect and see data on the cluster operation such as the required time of a group failover and that of resource activation.For details, see "Cluster statistics information collection function" in "The system maintenance information" in the "Maintenance Guide".
Note
In Cluster Statistics, File Size can be specified as follows:
Mirror Statistics
This function can be used to collect and reference information about the mirroring performance.For details, see "Mirror statistics information collection function" in "The system maintenance information" in the "Maintenance Guide".
System Resource Statistics
Select whether to collect system resource information.System resource information is collected regularly so as to improve system operability. System resource information is useful for investigating the operation status of EXPRESSCLUSTER, and makes it easy to determine the cause of a failure attributable to a shortage of system resources.
Initialize
Used for initializing the value to the default value. Click Initialize to initialize all the items to their default values.
2.2.20. Extension Tab
Other cluster functions are set.
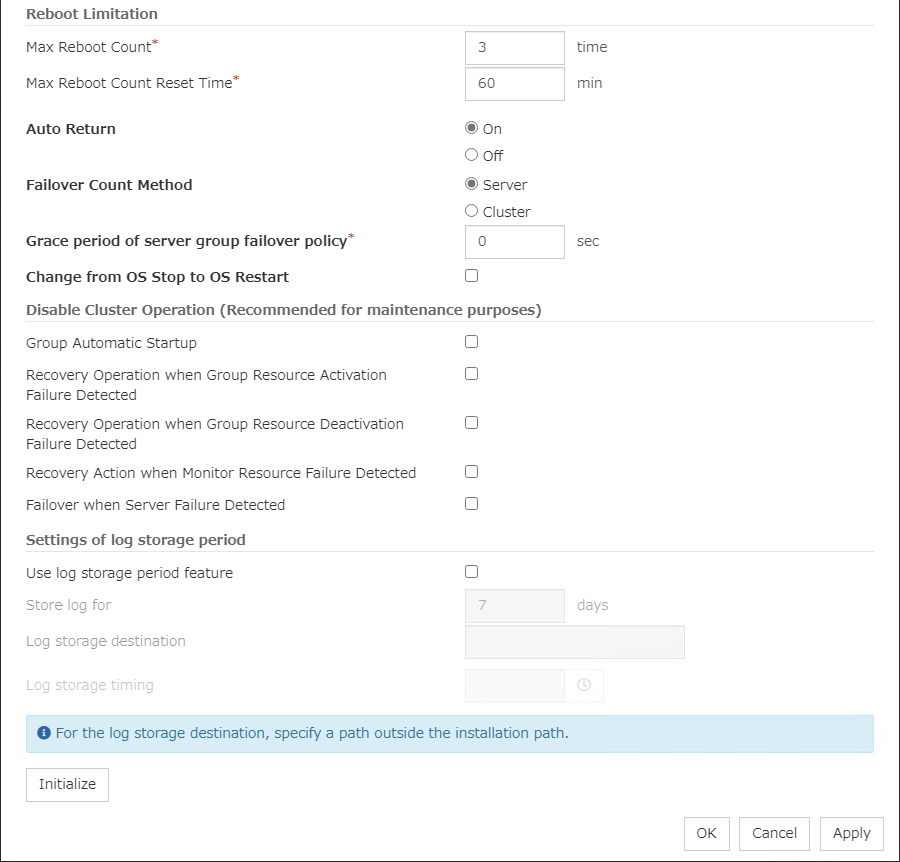
Reboot Limitation
You can specify the Reboot OS or Shut down OS as the final action at abnormality detection for group resources and monitor resources. If either of them is selected, reboot may be repeated infinitely. By setting the reboot limit, you can prevent repeated reboots.
Note
If Max Reboot Count is set to 1 or greater, usually set Max Reboot Count Reset Time to 1 or greater (default: 0). If Max Reboot Count Reset Time is set to zero (0), the reboot count is not reset. To reset the reboot count, use the clpregctrl command.
Auto Return
For preparation against a server stop in a way other than a cluster shutdown/stop or against a failure in normally completing a cluster shutdown/stop, you can determine for the next OS startup whether to automatically recover the cluster service restarting after its crash.
Failover Count Method
Select the method to count the number of failovers from Server or Cluster.
Grace period of server group failover policy (0 to 99999)
Specify the time by which a failover start is delayed when the automatic failover is performed between the server groups. After a server failure is detected and then the specified time elapses, the failover is performed.
If you specify 0, no delay occurs.
Change from OS Stop to OS Restart
Determine whether the OS stop action is collectively changed to OS restart action.
Note
If you want to make the action change, it is recommended to configure a network partition resolution resource or forced stop resource as well.
The changed action changes the following actions.No actions other than those below are changed.
Note
The action change does not affect the following monitor resources:
Message reception monitor resources
User space monitor resources
Mirror disk monitor resources
Hybrid disk monitor resources
Hybrid disk TUR monitor resources
Disable cluster operation
Note
The disablement feature of Recovery action when a monitor resource error is detected does not support the following actions:
Action when disk RW monitoring resources detect stall errors
Action when timeout occurs in user space monitor resources
Recovery action for message receive monitor resources
Settings of log storage period
Initialize
This operation is used to return the value to the default value. Click Initialize to set all items to their default values.
2.3. Servers Properties
Configure setting information of all servers in Servers Properties.
2.3.1. Master Server tab
Configure the priority order of the servers. All the registered servers are displayed. Master server is the server to keep the master of cluster configuration information. And also, it is the server of the highest priority order.
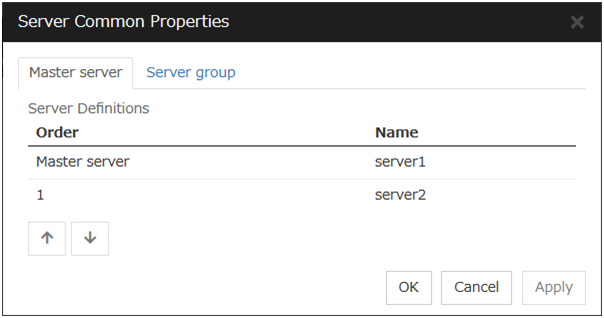
Order
Used when changing the priority order of the servers. Select the server to be changed from the server definition list, and click the arrows. The selected row moves.
2.3.2. Server Group tab
Set server groups.
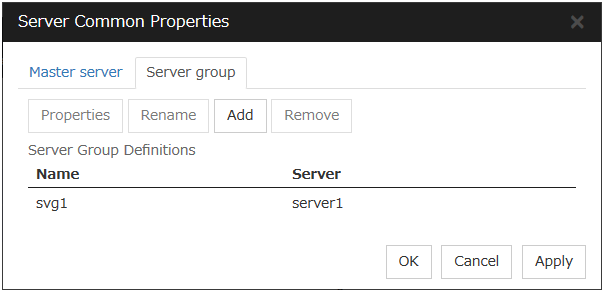
Add
Add server groups. The wizard windows for adding the server group is displayed. For details, see "Create a cluster" in " Procedure for creating the cluster configuration data" in "Creating the cluster configuration data" in the "Installation and Configuration Guide".
Remove
The selected server group is removed.When the selected server group is used for the settings of the startup server of the failover group, the server group cannot be removed.
Rename
The change server group name dialog box of the selected server group is displayed.
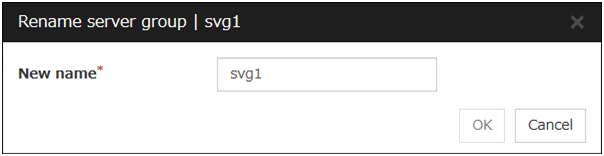
There are the following naming rules.
There are naming rules that are the same as the host name of TCP/IP that can be set by the OS.
Up to 31 characters (31 bytes).
Names cannot start or end with a hyphen (-) or a space.
A name consisting of only numbers is not allowed.
Names should be unique (case-insensitive) in the server group.
Properties
Display the properties of the selected server group.
Server Group Definition
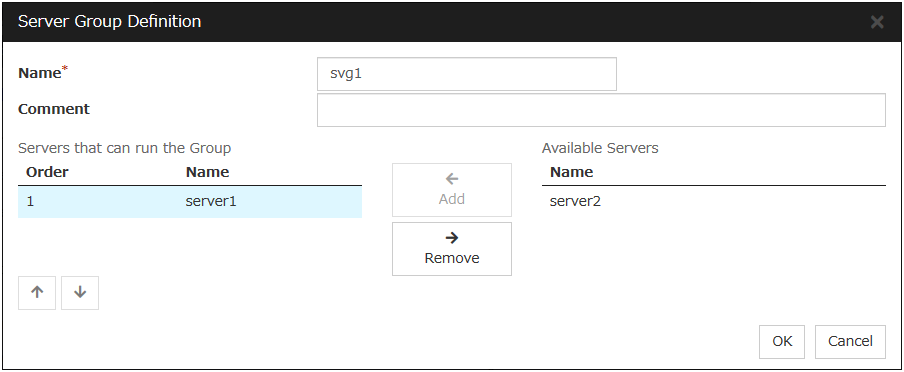
Name
Display the server group name.
Add
Use Add to add a server that can run the group. Select the server you want to add from Available Servers list and then click Add. The selected server is added to the Servers that can run the Group.
Remove
Use Remove to remove a server that can run the group. Select the server you want to remove from the Servers that can run the Group list and then click Remove. The selected server is added to Available Servers.
Order
Use the arrows to change the priority of a server that can run the group. Select the server whose priority you want to change, and then click the arrows. The selected row moves accordingly.
Servers
Display the server names which belong to the server group.
2.4. Server Properties
Configure individual settings on each server constructing the cluster in Server Properties.
2.4.1. Info tab
You can display the server name, and register and make a change to a comment on this tab.

Name
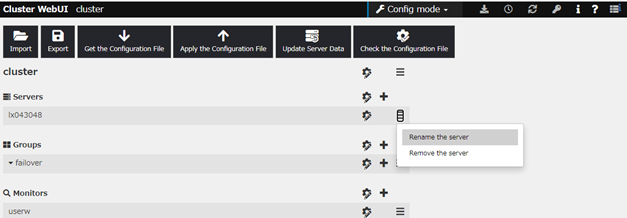
The selected server name is displayed. You cannot change the name here.
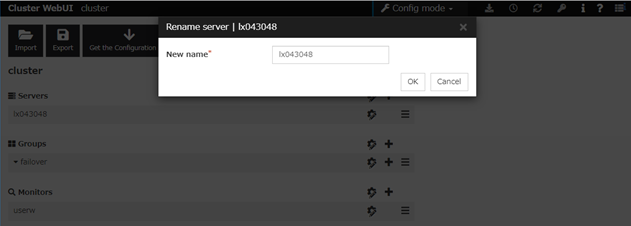
Changing the server name
click others, and then select Rename the server.
A dialog box to rename server is displayed.
Naming rules
There are naming rules that are the same as the host name of TCP/IP that can be set by the OS. It should be completely the same as the name set to the server.
Up to 63 characters (63 bytes)
Neither hyphen (-) nor space can be the first or last letter in names.
Underscore (_) is not allowed.
A name consisting of only numbers is not allowed.
Do not use "localhost" as the server name.
Comment
You can specify a comment for the server. Only alphanumeric characters are allowed.
2.4.2. Warning Light tab
Set an IP address of warning light (specified by NEC) controlled by network.
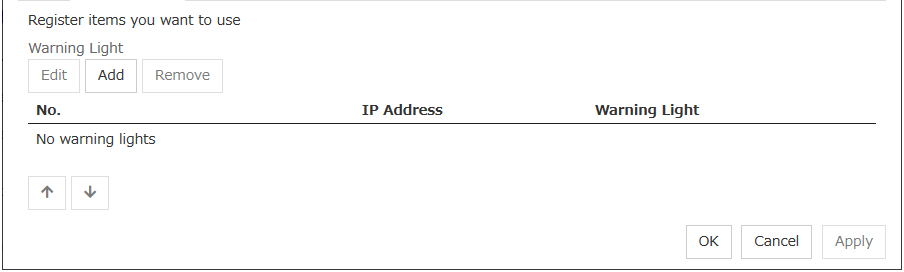
Add
Use this button to add an IP address of warning light. Click Add to open the Enter Alert Lamp dialog box.
Remove
Use this button to remove an IP address of warning light. Select the target setting, and then, click Remove.
No.
The arrow can't be used because only 1 warning light can be registered at present.
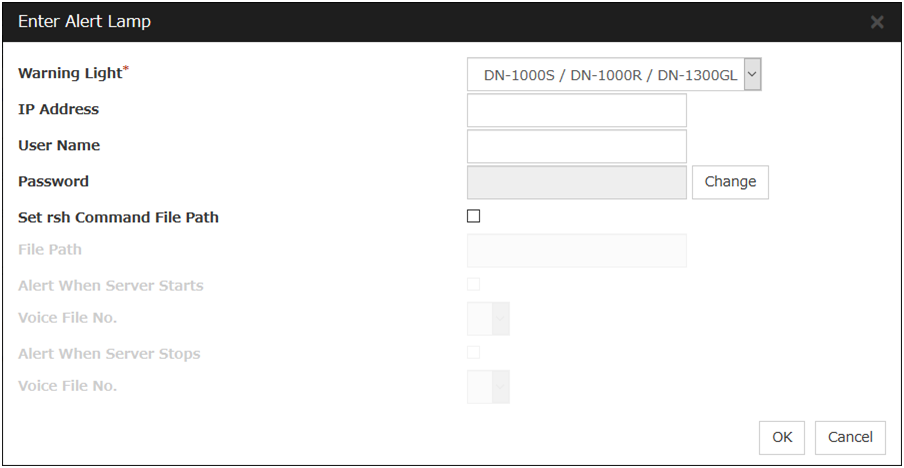
Warning Light
Select the product number of the warning light you use. The products corresponding to each number are as follows.
Product Number
Product Name
DN-1000S/DN-1000R/DN-1300GL
DN-1000S/DN-1000R/DN-1300GL
DN-1500GL
DN-1500GL
NH-FB series/NH-FB1 series
NH-FB series/NH-FB1 series
NH-FV1 series
NH-FV1 series
IP Address (Within 80 bytes)
Enter an IP address of the warning light.
Note
One warning light is required per one server. Do not set an IP address of the same warning light to multiple servers.
User Name
Enter the user name of the execution account on the server used for controlling the warning light.
Also, the user name specified here is used as the remote user name for the rsh command.
Password
Enter the password of the execution account on the server used for controlling the warning light.
Note
Enter Administrator for user name, Administrator for password.
Specify rsh command execution file path
File path
Enter the full path of the rsh command to be used for controlling the warning light.Specification example: C:\WINDOWS\system32\rsh.exe
Playback of an audio file
Playback of an audio file is enabled when DN1500GL or NH-FV1 series is selected as the warning light type.If you change the warning light type to other than DN1500GL or NH-FV1 series after playback of an audio file was enabled, playback of an audio file will be disabled.
Alert When Server Starts
Voice File No. (DN1500GL: 01 to 20, NH-FV1 series: 01 to 70)
Set the number of the voice file to be reproduced at server start.
Alert When Server Stops
Voice File No. (DN1500GL: 01 to 20, NH-FV1 series: 01 to 70)
Set the number of the voice file to be reproduced at server stop.
Edit
Use Edit to edit the warning light setting.
Note
To play the audio file, it must be registered in the network warning light. For more information on audio file registration, refer to the instruction manual of the network warning light to be used. Set the audio file number corresponding to the audio file that is registered for the network warning light.
2.4.3. HBA tab
Set the HBA to which the shared disk is connected.
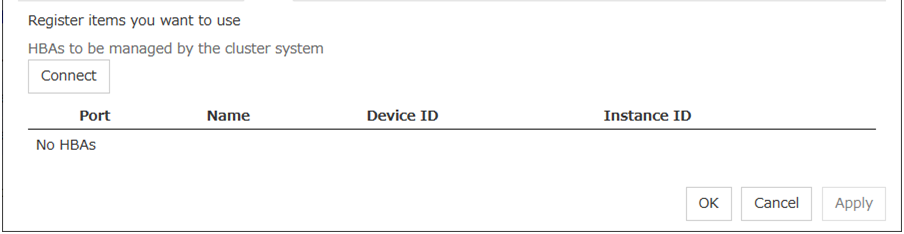
List of HBAs to be managed by the cluster system
Set the access to the shared disk. If the check box is selected, access to all disks connected to the HBA is controlled when starting the OS next time. To protect data, it is required to select the check box of the HBA to which the shared disk is connected.
If the HBA list is not displayed, it can be displayed by clicking the Connect button.
Important
Do not connect the shared disk to any HBA whose check box is not selected. Even though the check box is selected, do not connect to the shared disk when the OS is not started again after configuring the settings. Data on the shared disk may be corrupted.
Do not select the check boxes other than those of HBAs to which the shared disk is connected. If access to the system partition on which the OS has been installed is restricted, the OS may not be started.
Do not select the check boxes of HBA that connects the mirroring target internal disk if you use mirror disk resource. Starting mirror disk resource fails.
Partitions excluded from cluster management
When a disk other than the shared disk is connected to the HBA set in HBAs to be managed by the cluster system, register the partitions on the disk. The access to the partitions registered with this list is not restricted.
Important
In principle, do not register the partitions on the shared disk that can be accessed from multiple servers. Data on the shared disk may be corrupted.
Connect
Select this to get the HBA data by connecting to the server.
Add
Add a partition that should not be restricted in its access in Partition excluded from cluster management.
Remove
Remove the selected partition from Partition excluded from cluster management.
2.4.4. Proxy tab
Sets proxy information.

Proxy Scheme
Sets protocols you want to use.
None: Proxy is not used. HTTP: HTTP is used.
Proxy Server
Sets DNS host name (or IP address) you want to connect.
Proxy Port
Sets the port number you want to connect.
2.5. Group Properties
For more information, see "3. Group resource details" in this guide.
2.6. Group Resource Properties
For more information, see "3. Group resource details" in this guide.
2.7. Monitor Resource Properties
For more information, see "4. Monitor resource details" in this guide.
2.8. Parameters list
Parameters you can specify in the Cluster WebUI and their default values are listed below.
"How to change [1]-[9]" represents the way you apply changes of parameters on servers. Applicable method is marked with "✓."
Priority |
How to change |
|---|---|
1 |
Shut down and reboot cluster |
2 |
Stop and restart the cluster daemon |
3 |
Suspend and resume the cluster daemon |
4 |
Stop and restart the group
(Stop and restart the resource)
|
5 |
Restart the Node Manager service |
6 |
Restart the Information Base service |
7 |
Stop and restart the WebManager Server
Stop and restart the alert log
|
8 |
Restart the API service |
9 |
Upload only |
To form a new cluster, refer to the "Installation and Configuration Guide".
2.9. Upper limits of registration
Version |
You can register up to |
|
|---|---|---|
Cluster |
12.00 or later |
1 |
Server |
12.00 or later |
32 |
Server Group |
12.00 or later |
9 |
Group |
12.00 or later |
128 |
Group resource
(Per one group)
|
12.00 or later |
512 |
Monitor resource |
12.00 or later |
384 |
Heartbeat resource |
12.00 or later |
16 |
Witness heartbeat resource |
12.10 or later |
1 |
Network Partition Resolution Resource |
12.00 or later |
64 |
Mirror disk resources and hybrid disk resources (Per cluster) in total |
12.00 or later |
22 |
Mirror Disk Connect |
12.00 or later |
16 |